Festive Nails

I love to paint my nails. To celebrate the fourth, why not have festive nails?! Ok, I LOVE to do designs on my nails. So that's what I did. It's really easy to do designs with a straight pin. 

Since it's the fourth, I wanted to try out doing fireworks. I haven't done fireworks before but why not try? I used a base color of blue. I did two different fireworks.
(Don't judge my dry hands :) )
The first I used the head of the pin. I unscrewed the nail polish, wiped off the excess and lightly touched the head of the pin to the nail polish brush. This gets just the right amount of polish on the pin. Now, touch the head of the pin lightly to the nail. If you push too hard, the middle of the circle won't transfer from the pin. I got fresh polish on the head for every dot and frequently wiped off the head. I alternated the rows of the burst in red and white and shazzam, firework. Now, let dry and put a clear top coat over it.

The second firework I used the tip. Just like the first, I unscrewed the nail polish, wiped off the excess and lightly touched the tip of the pin to the nail polish brush. I got paint on about 1/4" of the tip. This will create dashes. I lightly touched the nail with the polish. I got fresh polish on the pin for every dash and frequently wiped off the pin. I alternated the colors differently than the first firework as seen in the picture. I used the head for the center. And just like that, a different firework! Apply a clear top coat to this one as well.

Enjoy your fourth!!

Month by Month Onesie Winner

The winner of Teresa's set of Month by Month Onesies is . . .


Send your address to teresa at creativecowgirl.co and she'll get those to you ASAP!

Thanks to everyone who entered--and remember, you can make your own set with the free printables Teresa included in her post.

Guest Post: Alissa from Will Run for Stamps

I met Alissa on Scrapbook.com. She has a great sense of humor, she's an inspiring runner and a very talented papercrafter. Along with beautiful layouts, Alissa makes STUNNING cards. She is amazing at using colored pencils--not just any colored pencils, but she works her magic using watercolor pencils. She's sharing a really cool tutorial today about how to color images using Loew-Cornell pencils. We're excited have her, please check out her blog, Will Run For Stamps. Take it away, Alissa!


Be sure to check my labels on the left for more tutorials, examples, and ideas.

Step by step with Loew-Cornell pencils.

Digital stamp by Natalie for Whimsy Stamps. Simply adorable!


Started with a nice yellow, light pressure all over.


Same yellow, more pressure at center.


Create more shadows with a darker color.


A bit of orange all over, the center and petals.


Create shading in the center with darker color.


A bit of brown but I don't like it so...


I use my handy dandy eraser!


Trying the center again.


Used these two colors.


My newest favorite trick. Using a weird color like Ultramarine in the darkest corners. Only a little bitty bit.


Good enough.


Good stuff. Digis are compatible with everything, pencils, watercoloring, Copics, chalk. Love my Prismacolor pencil sharpener. I have two good erasers. The plastic one by Derwent and the Artgum is also outstanding.

Finished images with Loew-Cornell pencils. Both are digis by Natalie for Whimsy Stamps.


Cards featuring Loew-Cornell pencils.

Digi by Meljen's Designs for Whimsy Stamps.


Digi by Beccy.


Digi by Natalie for Whimsy Stamps.

Thanks for guest posting, Alissa!

Patriotic Pinwheels

So last week I was looking for a centerpiece I could make with my current craft stash so I wouldn't have to spend any money or go shopping. It just came to me: PINWHEELS. Then I thought Patriotic Pinwheels would be a great idea for the Fourth of July.

Photobucket

Pinwheels are VERY easy to make and fun to do while you watch mindless TV (Like The Singing Bee). Here is a very detailed process:

Photobucket
Cut your paper in to a square. Mine is 4 x 4

Photobucket
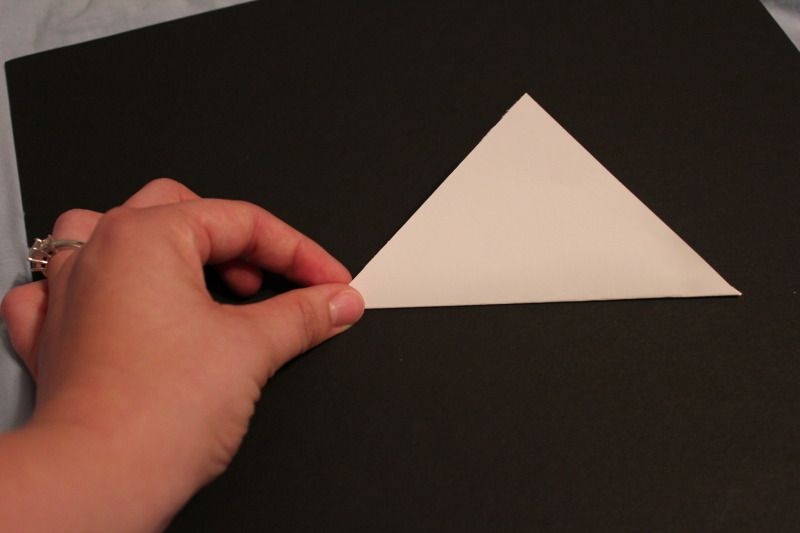
Fold the square into a triangle like so


Photobucket
Ta da!

Photobucket
Open it back up. You now have a crease running from one corner to another.

Photobucket
Now fold the opposite corners in to a triangle.

Photobucket
 Open it up and you have created diagonal creases in your square.

Photobucket
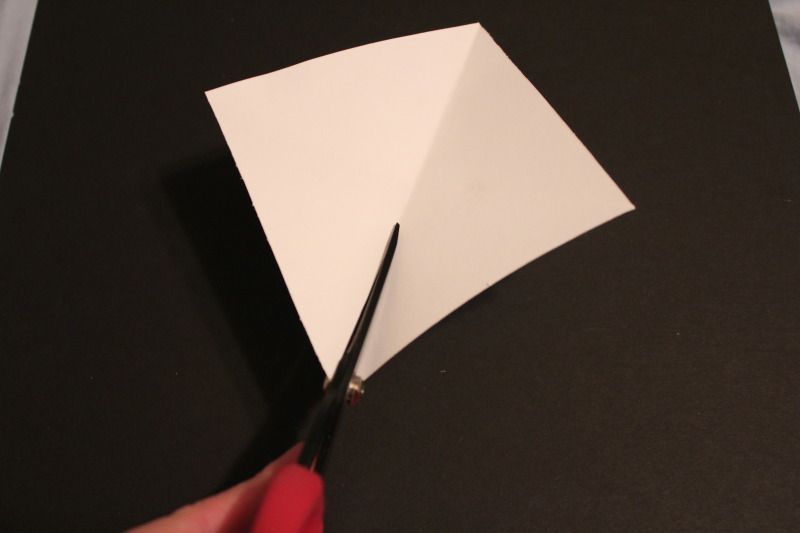
Using scissors, cut 2/3 of the way in, along each diagonal.

Photobucket

Each of the creases are now cut. Hard to get a picture of that.


Photobucket
Next, make a hole in the center of the square, about where the creases meet (I'm neither perfect at folding or sticking the the need in the right place, but it won't be an issue). I used a needle, but you can use a thumb tack or any type of scrapbook tool that punches holes.

Photobucket
Next make holes in every other point you've cut like so.

Photobucket
Grab a brad

Photobucket
Thread one of the holes you made on a point

Photobucket
 Repeat

Photobucket
 Repeat

Photobucket
Until you have all four points into the brad.

Photobucket
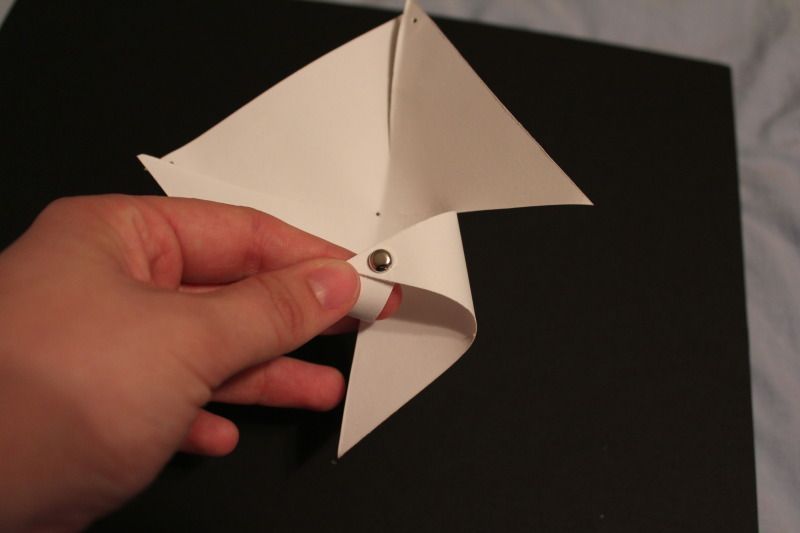
Push the brad to the back and through the hole you made in the center.

Photobucket

Photobucket

Then open the brad and secure it. 

Photobucket
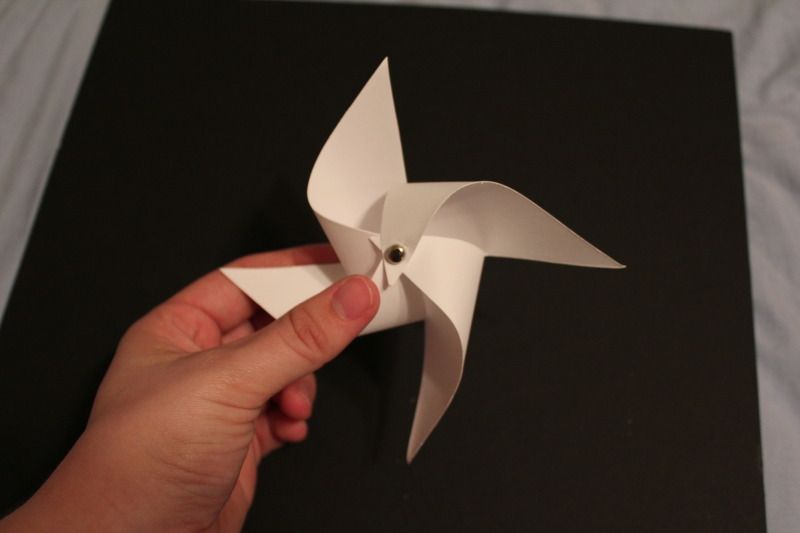
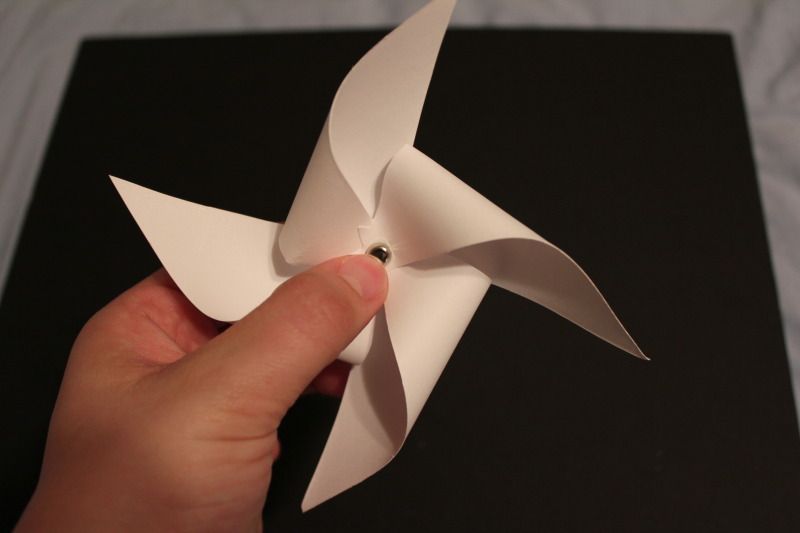
Admire your work!

I got to where I was cutting 3 at a time (layering them) and that made things go much faster!

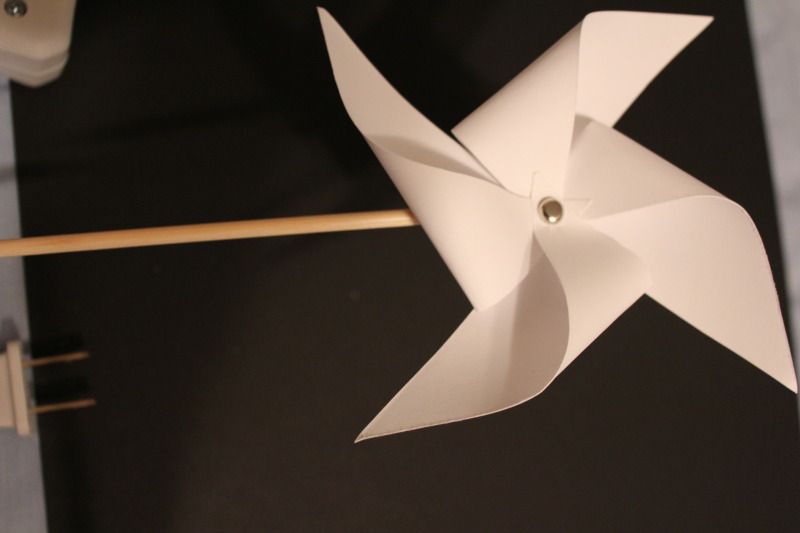
I decided to put my pinwheels on some skewers I had in the kitchen, since have more than 100. These won't actually work in the wind, they're just for pretty. I just hot glued the skewers to the back.

Photobucket

Photobucket
I used some old Coke bottles my husband gave me and then some pebbles I had to anchor the skewers.

I had some left over so I also made a garland by hot gluing them to some twine I had:

Photobucket
(Good pictures are not taken at 10pm)


I'm ready for the Fourth! How would you decorate with Pinwheels?

ETA: Don't forget about Teresa's GIVEAWAY!! Today is the last day to enter!

Fourth of July Patriotic Word Art (Free Printable!)

Don't forget: tomorrow is the last day to enter the month-by-month onesie giveaway!

Since our Founding Father shares a name with one of our country's Founding Fathers, the Wayward Girls have been brought up with a love of our homeland.

To celebrate the Fourth of July this year, I decided to try my hand at my first "formal" word art:


To print this free printable, click on the picture above. (You might want to open the image in a new tab or window.) Make sure that the image is full-size: it should be bigger than your screen. If it isn't full size, click on it to blow it up. Then, from the menu of your browser, select print preview. The image is designed to print at 7"x9.1" (I had it at 8x10 but it was giving my printing program troubles still. Plus you can use a mat this way.) Make sure your page orientation is set to landscape and scale the picture to fit the page.


(Or you can fiddle with the settings to get it to print however you like.)

I think the "of the" might be my favorite part. The font looks like it's from a dollar bill!

How are you planning to celebrate (or decorate for) the Fourth of July? Or what's your favorite patriotic holiday?

Guest Post: Basic Woodworking Hacks from Dad/The Original Wayward

Filling in for Mom (Diana) today is her husband AKA Dad AKA Ben AKA The Original Wayward. He's an unapologetic woodworking fanatic/purist/snob—and that's okay!

One of the crafts that I have pursued is woodworking. The Girls have requested a guest post on some tips and tricks. Here they are:

1) You don't need a garage full of fancy power tools to do woodworking. Saint Norm and other woodworking show hosts would have us believe that woodworking can't be done without pneumatic nailguns, four drills, six routers, etc. In Norm's case, some of that is because his background and training is as a Finish Carpenter. He got paid to do things fast. Many shows are sponsored by tool manufacturers. If this is a hobby, doing it fast, with lower quality will probably not end up being an enjoyable experience. It's really not supposed to be fast. It's supposed to be enjoyable and it's supposed to produce beautiful objects.

2) Wood is an organic material. Many people approach woodworking as if they were working with pretty pieces of metal or plastic. Because wood was once living, it can move a lot with humidity changes. What this means is that you must account for wood movement—especially when working with broad boards. Saint Norm's background in plywood built-ins did not prepare him for this. Many of his early projects ended up as firewood.

3) Get to know the grain of the wood. Consider going to the added expense of figured wood. Acquaint yourself with terms that describe grain such as: figured, curly, tiger-stripe, fiddle-back, quilted, and flame. Patterns for grain-matching include bookmatch, slipmatch, and others.

Figure—it's hard to capture in photos, but the wood shimmers like Tiger Eye.
Fiddle-back figure on mountain ash and birds-eye maple

4) Learn to process green wood. Small pieces are pretty easy to deal with. For larger trees, you can hire a portable sawmill to come cut them up. You can make crafts from trees that were significant to your family and such. I have wood from a cherry tree that was blown down in '96 by Hurricane Fran that was next to the Wayward Girls' swingset. I keep threatening to make jewelry boxes for them with it. One-a-these-days...

5) If you don't value solid wood and actual craftsmanship, it will be much easier for you if you stick with junk from Sauder and Ikea. It doesn't survive moves well, but on the plus side, until you have to move it, it superficially resembles wood furniture from a distance, and is frequently good enough. The follow-on argument here is that home-crafted furniture is not cheap. The materials will usually cost you more than the above-mentioned ready-to-assemble junk, and that doesn't include the purchase and maintenance of tools, your time, quality finishes, etc. Like any other hobby, justify it because it's something you want to do, not because you are going to save money.

6) Polyurethane finishes are usually a mistake. It is a plastic coating that is difficult to repair and has a nasty, plastic feel. Instead, use a high quality tung oil, varnish or shellac.

7) Most people don't enjoy sanding, which is fine, because you should avoid sanding anyway. Learn to use hand planes and finishing scrapers. The wood will look better, there will be less dust, and you will probably enjoy the hobby more.

8) Wear hearing and eye protection. Even for common stuff like hammering nails—nails would not be found woodworking, but wood butchery, but that is another topic—drilling, and power sanding. Any time you are using a power tool, you should have on safety equipment.

Display case made for a hand-knapped obsidian knife. (Case by Ben; knife by someone else.)


9) Finish the finish. None of us live or do woodworking in a clean room environment. Expect to have to deal with dust nibs and drips that you didn't notice, etc. This is one of the reasons polyurethane is bad. The finish doesn't just go on magically. If you choose a finish that you can make better with each coat, then you have the opportunity to make it look good—maybe even great. Learn to use steel wool and mineral oil (if compatible with your finish).

10) Due to the nature of this blog, I'm guessing most readers will be females. Many fine craftsmen are in fact craftswomen. If you are interested in woodworking and your friends won't help you or encourage you, get new friends.

Resources and Links
Saint Norm is Norm Abrams of the New Yankee Workshop—one of the most classic and popular woodworking shows ever. [The parody picture above was not done by Ben, and please realize tongue is firmly in cheek!]

Veneer matching tips

My favorite Woodworking TV show: Woodworks by David J. Marks. Originally aired a few years ago.

If you have any questions, contact me directly at benz2 at earthlink.net. I'd be happy to advise.

Ben Franklin
Original Wayward

Darts

Darts add shaping to the bust or back of a piece of clothing. Making darts is a lot easier than I thought it would be. I would recommend practicing before you put it on your actual garment. Practicing on a scrap before sewing your garment for most things is a pretty good idea I've found.

With darts, remember to always go from the widest point to the narrowest point (even in back darts.) Transfer ALL marks from the pattern, especially for the dart, with chalk or sewing transfer paper. You should have something that looks like a triangle.
There should also be a few circles along the outer lines of the triangle.These are important. Fold your dart in half then pin your dart matching the circles on both sides. The circles and the lines should match evenly. Now you're ready to sew!


Bust Darts:
Your stitch length should be at the basic 2.5. We're starting from the widest part of the triangle. Back stitch 3-4 stitches after starting.  Sew until you are about 1/2 inches away from the point of the dart. Reduce your stitch length to 1. Sew all the way to the end of the point. Do not back stitch. Simply cut the threads long and tie a knot. Trim all threads after you're done. Do not serge the dart.

Back Darts:
With back darts, you start in the middle. It's the same concept, start at the widest point and move toward the point of the dart. It is the same steps as the bust dart after that.

Pressing the dart:
First press the sewn area so there is a crisp crease on the fold of the now sewn dart. This won't show on the outside but it will make the dart lay flat. For a dart on the bust, press the dart down. For darts on the back, press toward the center.

Related Posts Plugin for WordPress, Blogger...