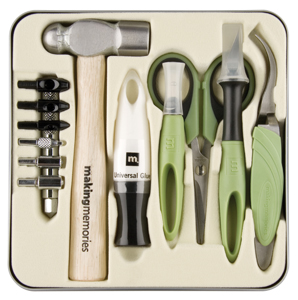
Brooke's Tools of the Trade!

As I was making some cards the other day I realized I almost always use some of my basic tools every time I do a craft. Once I started thinking about it I wanted to do a blog post about how I love use these.

The first one has to be my eyelet setter. I have one that comes in a kit with a few tools. Jaime prefers her setter because it is not so LOUD :)

My second item also has to do with paper crafting. It is a corner rounder. I love the detail this adds to cards, bookmarks, and scrapbooking pages.
Here are the cards with an example of both of these.

Of course I also think this goes without saying but my sewing machine is very much a necessity! I recently inherited a sewing machine from someone who hadn't used it in a long time and no longer was going to use it. I cleaned it up and lubed it up and it works fantastic! It was great timing because mine was starting to wear and have a few problems. This is the machine I have:
It is a Singer 5040 C which they don't make any more but this is about the same machine.

What is your favorite tool of the trade?
Click the product pictures to be taken to Scrapbook.com's superstore where you can purchase them! (disclosure: we're an affiliate of Scrapbook.com; we'd receive a few cents if you bought something from SB.com from the product links in these posts)

Jaime's Favorite Crafting Tools of the Trade

This fun theme was all Brooke's idea. I wanted to share with you the products I LOVE to craft with. Click the product pictures to be taken to Scrapbook.com's superstore where you can purchase them! (disclosure: we're an affiliate of Scrapbook.com; we'd receive a few cents if you bought something from SB.com from the product links in these posts) Also, click my project pictures to go to the blog post about them.

Herma Dotto Dots Roll Dispenser with REMOVABLE adhesive.

This thing is a lifesaver. I love how strong it is as well as being repositional within the first few minutes of sticking something down. I need that, because I am indecisive and rather...un-straight when I am papercrafting. I love when I pull something up that I can wipe the excess adhesive away and it doesn't leave a mark! I used this adhesive here (and in all of my scrapbook pages) :

Photobucket

Martha Stewart's Circle Cutter


I love this circle cutter. I have wrestled other circle cutters before trying this beauty (which was cheaper than just about any other!). Finally, I found a circle cutter that works. I love the results. See? Aren't they great?


Tim Holtz Scissors


During a National Scrapbooking Day celebration on Scrapbook.com, I won a door prize. It was filled with all kinds of goodies, including these scissors. I love them and use them all the time:


Photobucket

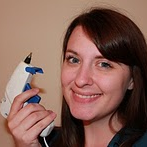
Finally, what is a crafter without her trusted glue gun?


Mine is just as nasty, or even nastier than yours! Of course it is used on tons of projects, like this one:


What are your tools of the trade?

Tools of the trade 1: Favorite knitting & cooking tools


School is starting here and it's about that time of year I get the annual knitting fever, and a new burst of energy for cooking. Brooke wanted to do a series on our favorite tools, so here are some of my favorite knitting and cooking tools:

Cooking

Oven-safe, non-stick skillet with a lid; pizza stone
I love my oven-safe, non-stick skillet with a lid. It can do just about everything in the kitchen: stovetop, oven (um, duh), covered simmering, etc. To go from stovetop to oven before, I'd have to use one of our cast iron skillets, and I never manage to wash one of those without ruining the season. It's also my biggest skillet, with really high sides, so it's got an amazing capacity. Plus, hey, it's a fun color (especially since my other pots and pans are all gray/black.) I know it seems like a lame gift, but I was really happy my husband found this for me for Christmas :D .

My pizza stone was a wedding gift. While we do love it for pizza, it's also great for baking bread and . . . I know we've used it for other things, but I'm blanking here. Anyway, it might look dirty there, but that's actually intentional, apparently: the packaging that came with it dictated that we never use soap to clean it, and that any stains and marks make it better. (They phrased it better.)

Knitting

"Knittin' Kaboodle"—it was only $6!


I really just pulled this out the first time, but I already love it. This is how I used to store my needles etc.:


And now:

The pocket holds a bunch of my favorite notions, including bone rings (stitch markers), stitch holders, yarn needles(love these!), and row counters.

My favorite "standard" tool is a plastic knit gauge (disclosure: we're an affiliate of Roberts; we'd receive a few cents if you bought something from Roberts from the links in these two paragraphs):


It looks boring but it helps you to make sure your finished pieces end up the right size (if your gauge is off, your 36" bust sweater could end up being a 30" or 46" bust sweater!). It's also great for sizing those random loose needles, or the circular or double point needles that don't have labels on them.

And my favorite "surprise" knitting tool:


A crochet hook! (As a reminder, crochet and knitting are two different fiber arts. Knitting uses two straight needles with a row of stitches on one; crochet uses one hooked needle which works one stitch at a time. They use very different techniques.) I am not a crocheter. I'm just not good at it. I don't do crochet edgings; I'm hard pressed to even do a crochet cast on.

However, my crochet hook has saved me countless times. Sometimes a stitch falls off a knitting needle before you work it. These loose stitches unravel and can undo the entire column throughout the whole piece. But with a crochet hook, you can fix the dropped stitches:
from Knitty.com

Voila! You're saved!

What are your favorite knitting and cooking tools?

Mini envelopes with windows

As Jasmine told you, we tried our hand at gum paste a couple nights ago. You may notice that my post is not labeled gum paste. My rose  didn't turn out so well. I think the class will be fun, and I will get to add gum paste and fondant to my cake decorating skills.
So.... instead I am going to share a few ideas about mini envelopes with cut out windows. I have 2 templates for making small to medium envelopes. I happened to get it from a home sales stamp company, but I am sure you can get one from other sources. If you can't find a template, find some envelopes that you like and take them apart. Create your own template.

I traced my pattern on to the back of the paper I selected for my first mini envelope. I chose a medium blue paper with snowflakes on it.  Make sure to press hard with your pen or pencil when you are marking lines for folding. This will make your edges sharper. I like to use a straight edge just to make sure they are straight. I also cut out a rectangle in plain white for the card inside the envelope. Then I used a snowflake punch on the front of the envelope. I saved the snowflake and glued it on the card. I turned it so that the snowflake does not show through the window when sealed. To glue the flaps down, I use either a glue stick or double sided tape. I punched another snowflake from a shiny gold fold adhesive paper. I used this to seal the envelope shut.


Envelope two has a photo showing through the window. This would be great to use for a child's thank you notes. You could snap photos of the gifts and have it show in the window.


Finally, I made a third envelope with a pumpkin cutout. I glued a Halloween paper on the back of the cutout.


For the second two, I actually traced tiny cookie cutters and then cut them by hand.

There are many other ways you can use mini envelopes. I made a bunch of them without the top flap and put word sorting activities in them for school. The students enjoyed pulling the words out and using the words.

Gum Paste

The mom and I have wanted to do a cake decorating class offered at Michaels for the longest time. It just hasn't really worked out with me away from home or mom working or whatever. Maybe it'll work out for us to do a class eventually but until then we'll just have to try some stuff out on our own. That's exactly what we did with gum paste. We bought a "just add water" tub of make your own gum paste. We found out it would've been far easier to buy the ready to use gum paste. We peeked at some books at Michaels and saw you can make Callalillies with a heart cookie cutter.

To make a Callalily, cut out a heart. Then, lightly flatten the edge of the point of the heart to give it a more realistic look. You're supposed to do this with some fancy tool and on top of a sponge. Well I didn't have that fancy tool. Instead I used a 1/4 tsp measuring spoon to improvise. I learned quickly don't press too hard! Next I overlapped the heart around, overlapping the curved edges. I made a cone for the flower to dry out of some tin foil and called it good.
To make the center, I mixed in some yellow food dye and rolled it. We had some edible gold flakes so I tried rolling the center in some. They didn't really stick all that well. I stuck some wire in the bottom of the center and hung it upside down on a basket handle to let it dry over night. After letting both the center and the flower dry over night, I put the center and wire through the flower. I don't really know how to make the center stick to the flower though. You can cover the wire with floral tape to make the wire stay somewhat.


Then I decided to try and do something for fun. I rolled some yellow, red, blue and brown. I made a yellow brick road with a toothpick making a light impression on the gum paste. then I made 2 blobs that looked like shoes and made the heel separately to attach after they had dried a little bit. Then I made a blue blob and covered it with brown and molded it into a cube to make a basket. I ended up accidentally breaking the handle so I made another one with white since I ran out of brown. Then I put the shoes and basket on the yellow brick road and called it good.

TWO Quick Pillow Case Adult Shirts

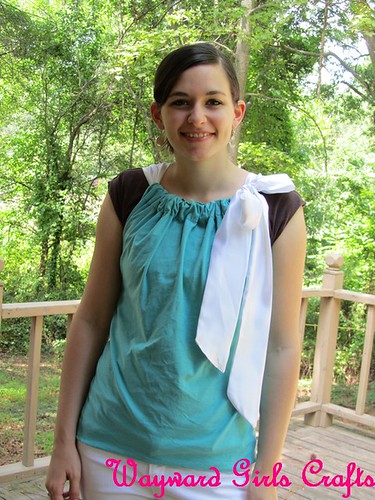
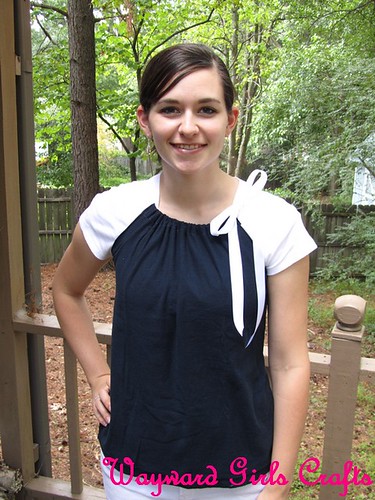
So I saw this tutorial here and thought this would be a great quick top to make. I did two versions- one like hers and the other my creation. One took me about an hour and 15 minutes the other took me about 20 minutes. As always when I was making things didn't go perfect but this is what I would do the second time around:

Pillow Case Top from Scratch
Needed:
1 hour and a half
3/4 yard of Jersey Knit fabric (60" wide)
1/3 yard of silky fabric (45" wide)
Coordination thread
Step One: Make the tie-
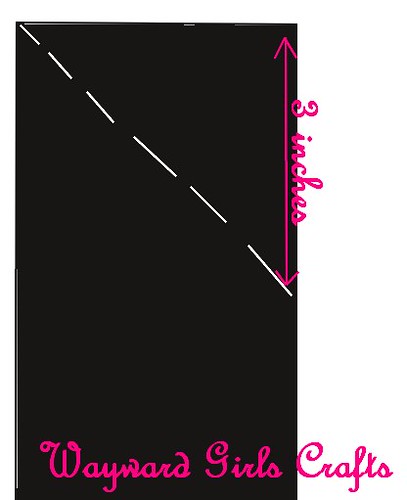
  1. Cut the silky fabric 5 inches wide in two 45" strips. I thought 3 inches was too wide:( If you want yours as wide as mine I originally cut 6 inch to make them 3" wide instead of 2.
    Don't you love how crooked they cut the fabric at the store?"pillowcasetop 004
  2. Sew the two strips together to make one long 90" inch strip.
  3. Fold in half with right sides together, pin.
  4. At each end three inches down mark a line to the opposite corner (see picture)and sew.PillowCasetops001
  5. Leaving a 6 inch gap in the middle, sew along edge.
  6. Turn right side out through gap in middle, fold under and sew gap.
  7. Press
Step Two: Make the shirt-
  1. Cut the fabric 23" (W) by 26"(L). In the tutorial I mentioned I found the dimensions to be way too large. I have a long slender torso so you may need to adjust your fabric somewhat. You might want to start bigger (her dimensions were 30" x 30") if you feel it will be too small. I made the other shirt first so I had some numbers to go off of.
  2. Press a two inch from top and baste stitch. This step it to prevent the jersey knit from rolling when you fold it over.
  3. Fold over to make casing a sew zig zag stitch along bottom of edge of casing.
  4. Thread the tie through the casing and put on. Pin where the arm holes should stop below your under arms.
  5. With right sides together sew up sides.
  6. Zig Zag stitch on arm holes and around bottom (see video). Try on

    pillowcasetop 012

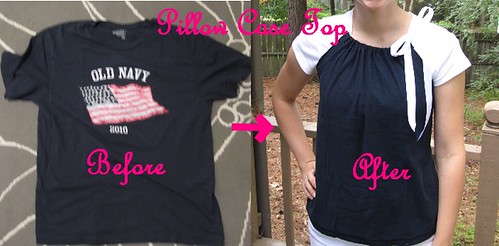
Very East Pillow Case Top from Men's Shirt

Needed:
20-30 minutes
Men's Shirt- I used my husband's old 4th of July Old Navy shirt that had shrunk a little. It was size large. The shirt after step one was 21" (W) by 23.5" (L)
1/2" wide ribbon
Coordinating Thread
Sewing Ruler
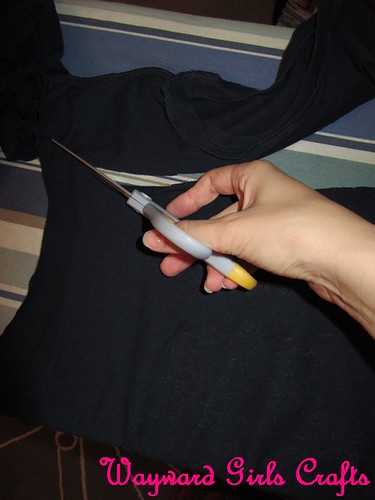
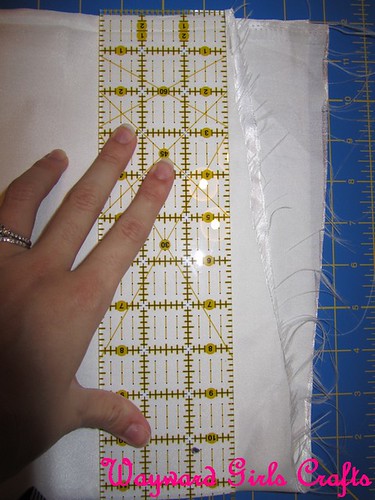
  1. Turn shirt inside out and cut off arms. Align the ruler at the base of the collar and cut in straight line across. pillowcasetop 003
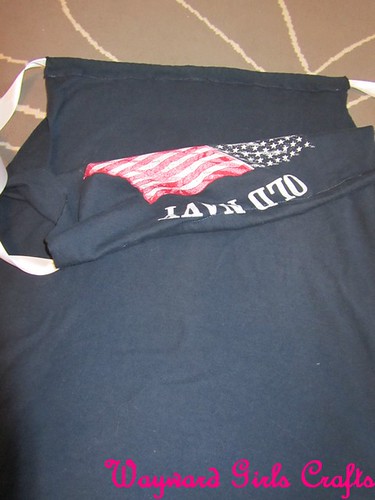
  2. Make 1" wide casing and straight stitch along bottom. **Make sure here that your new right sides is actually the inside of the shirt since. You don't have to do this but mine had a flag I didn't want on it so I just used it inside out. I will now refer to it as the (old outside and new inside) flag side. pillowcasetop 009
  3. With flag sides out sew along each side with a small seam allowance. I did this so that the old inside seam wouldn't show.
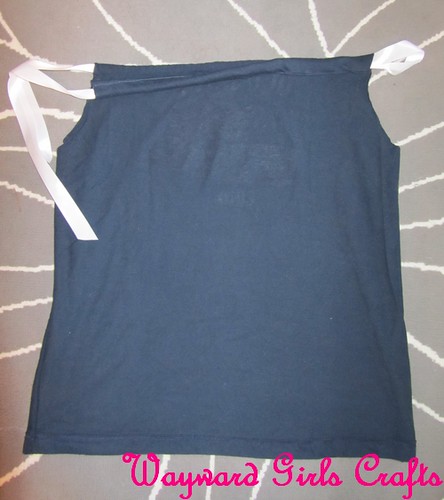
  4. Thread ribbon through casings and try on!
pillowcasetop 008
pillowcasetop 018

PillowCasetops019


Have any shirts you want to revamp?

Shoe Hangers

As I said last week, we just moved. and with moving comes purging and re-arranging. Our new place has a big master bedroom closet but that's about all it has in the way of storage. So a lot of things have to fit in there, including my craft stash, all my clothes and shoes. I found this cool idea on Pinterest (do you want an invite? Email me!):

Link here
 PERFECT idea for me! So I got to it:

and then I realized I didn't really have the tools I needed, so I improvised. My method is not the best, but it sure is WAYWARD!

Materials:
Wire Hanger

Tools:
Wire Cutter and Pliers would be best, but I used what I had, a pair of garden shears and a small adjustable wrench
Eye protection would have been a safe idea (I didn't have any problems, but you never know)


Step one, cut the wire hanger like so: 


On both sides, see?


 Then take your wrench pliers, and bend up the sides you just cut. Mine weren't the best because I was using that wrench.


Repeat on the opposite side


Then use your hand and pliers to bend the hanger like so. 


Here it is in action:


Oh, my beloved Bernardo's.

So my attempts weren't as cute as the original, but they are very functional and fast! I made 5 in about 10 minutes. I love that you can use them for flats too. 

Have you ever thought of hanging up your shoes?

Pina Colada Limonada Sherbet

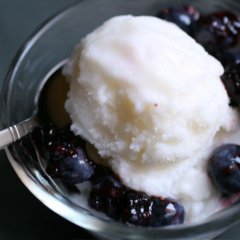
I was craving some pineapple sherbet last week, so I hit up my favorite recipe site. I liked this fruit sherbet recipe, and decided to have fun with it, since I didn't have any OJ around. The result was tart and tasty!

This is actually TheBittenWord.com's
Elderflower sherbet, but you get the picture.

Piña Colada Limonada Sherbet
  • 1 c lemon juice
  • 7 oz pineapple juice
  • 1 1/2 c sugar
  • 9 oz coconut milk
  • splash milk
  • 1/2 c crushed pineapple
Mix the sugar, juices and milk. Pour into a small ice cream maker and get it going. Wait to add the crushed pineapple until the sherbet has enough "body" to keep pieces from sinking straight to the bottom.

In 20-30 minutes, you have a soft sherbet that's ready to eat! You can also ripen the sherbet in the freezer.

The lemon taste was pretty strong for me, so when I make this the next time, I'm going to try these proportions:
  • 1/2 c lemon juice (maybe lime?)
  • 1 c pineapple juice
  • 1 1/2 c sugar
  • 1 c coconut milk
  • 1/2 c milk
  • 1/2 c crushed pineapple
What's your favorite taste of summer?

Wayward Shirts

I decided to surprise my sisters with some awesome WGC t-shirts. My mom was in on the secret. Here is the design:
(Mom's had "daughters' " instead of "sisters'")
And here we are at the beach sporting our awesome threads!
(from L to R: Jaime, Jasmine, Mom, Jordan, and Brooke)


I hope everyone is having a safe and awesome weekend!

Silk Flower Arranging Tips

Over the years, I have attended a couple of flower arranging classes-- nothing very intense. I really enjoyed them and have had fun arranging both fresh and artificial flowers. I have done the flowers for all of my girls' weddings and many other things. I buy flowers from warehouse stores. The cost is not great, so I am willing to try different things. Have some fun with flowers. It is very satisfying.

I wanted to have some pretty silk flower arrangements in my home, but didn't like how much a single stem costs. Nice flowers, such as hydrangeas and calla lillies can cost $7-10 a stem. So... one day when I was at a craft shop, I saw that all of their seasonal flowers were on sale for 90% off. I purchased lots of them. I can't remember whether it was spring or fall, but whichever one it was had many flowers whose colors worked well with my decor. Also, when you are paying less than $1 a stem, you are free to experiment an try unusual flowers and shapes. Don't forget to pick up lots of greenery and small flowers to fill in. Now I always look for the sales which occur at least 2x a year so I can stock up on flowers.*

Once you have your flowers, get some good wire cutting pliers and have get to cutting. You will want to cut some stems apart. I often pluck the bloom off and put it back on a stem I like better. I add leaves to flowers as needed. Sometimes I have to tape stems, greenery and/or blooms together with wire, floral tape, and toothpicks. I just like to experiment.

I use containers that I have around the house, or ones that I get at thrift shops (you can find very interesting things to use there. Think out of the box.) or at places like Big Lots.

Secure floral foam and the bottom of your container and create. Here is a link to some basic shapes of floral arranging.
*These sales are also a great time to stock up on flowers for the floral accessories and hair bows that are so popular now.

Here are a few of my arrangements:


Related Posts Plugin for WordPress, Blogger...