Dyeing Your Own Shoes

I want cute turquoise shoes. I found a bunch of cute turquoise sandals, but not "shoes." I knew I was going to have to take matters into my own hands.

At first, I planned to get patent leather shoes and spray paint them, remembering one of the Wayward Weekend shares of spray painted shoes. But I just couldn't find a patent pair I really liked.


And then I found these fabric shoes. I was still planning to spray paint them until I remember Jaime dyeing her own pants, so I picked up some teal Rit liquid dye.

I debated dipping them, but then I checked out Rit's website and found this dye-painting shoe project.

First I had to make sure the fabric would work for this. Synthetic fabrics (like polyester) won't take up dye, so I'd need paint of some kind. However, this fabric felt like cotton, so I took the chance--after a test.

First I mixed the dye: I used 4 tsp (or 1 Tbsp + 1 tsp) dye in 1 cup of hot (140 degree F) water. Then I tested the dye first in an inconspicuous place: under the toes. You're supposed to set dye with heat, but, um, without talking about why, just trust me when I say that microwaving your shoes is a bad idea. (They still smell really bad...)


Messy! Do this in a sink and rinse well afterwards--use rubber gloves and an apron. And then bleach.
Satisfied that the fabric would take up the dye, I reheated the dye and grabbed a foam brush. Interestingly, there was a lot of variation in the dye color.

I protected the wedge heels with duct tape, which pulled off a little bit of the faux cork finish. The plastic soles did get dyed, but the "cork" wedges didn't soak up the dye.


Cooking my shoes.
I tried to be very liberal with the dye, especially in the knot. There were a few spots where glue or a fabric treatment got on the white fabric that didn't show up until after I'd dyed them. Once they were pretty soaked, I dried them in a 100 degree convection oven with the door cracked for about 5 minutes (then let them sit for a while, and repeated a few times. Yeah. STINK.)

You can see the color variation a little here, as well as some spots where the fabric treatment/glue blocked the dye (along the edge and a spot & line on the side).

And here's the result:

I really like how they turned out--but I still need to rinse out the excess dye. There's a handpainted, almost watercolor effect in the tone variation, which I like (and we'll see if that stays after the rinse). The thread is probably synthetic, and it absorbed the dye differently.

If I don't rinse them, if my feet sweat or my shoes get wet, I'll end up dying my toes (or worse, a carpet!)! Once I get a chance and get them dried again, I'll give you an update on the final color.

What do you think? What color would you dye your shoes?

Fire and Ice (candles)

Who doesn't love to play with melted wax? My mom has a one of those paraffin baths (looks like a crock-pot) to relieve the pain from arthritis in your hands. My children (including at least one son-in-law) love to dip their hands in it over and over to create creepy looking gloves. They play with it forever! Anyway--- here's a chance to use some wax, and if you happen to dip your fingers in it and make molds, so be it.


This is a quick and fun way for older children (and older adults!) to make candles. You just need some wax, cotton string for the wick, empty milk or juice cartons, and some crayons. Oh, yeah, and some ice.

First, open your milk cartons all the way, and rinse them out. I used some very small ones, but you can use whatever size you want.


Then, measure how long of a wick you will need, and tie that length plus a couple inches on to a pencil. Make the string touch the bottom.


Next, put your ice in a ziploc bag and break it into small (about 1/2" cubes) pieces with a hammer. You don't want it too tiny and you don't want it too big. I put mine in a collander and rinsed it to get rid of the tiny pieces. (I tried using my blender first, but it crushed the ice too small.)

In the meantime, melt your wax in a double broiler or a candle warmer (if you have all day). You can add at this point. The kids can put in some old crayons to custom make a color.

Taking the picture while
pouring hot wax! Excuse the
blurriness.
Now, fill the carton with the ice. Make sure the wick stays put. The wax will begin to harden right away. I tried to be creative and put bits of crayon in the ice. I hoped the wax would melt them, but it didn't. I think it may still look cool when I burn the candle.


Let the candle sit until it is completely hardened. Then peel off the carton over the sink--- because most of the ice will have melted. Snip off the pencil. It will still take a while for all the water to get out, but once it does, you have a very interesting candle.


If I were doing it again, I think I would pour a thin layer of wax first to form a solid foundation. After it hardened, I would put in the ice and continue.

Lyrics + Photograph


First and foremost, Cassie if you are reading this, STOP! This is a present for you! No, seriously, stop reading!!!

My freshman year of college, I was introduced to Jack's Mannequin. I quite enjoy their song "Swim". It was stuck in my head the other day and I was immediately inspired to craft. I talked to my friend and we collaborated some ideas. Finally, I settled on a picture (from my friend's trip to Tahiti) and some lyrics from the song.

I printed out the photo on card stock. I let the picture dry for about an hour. I then trimmed the photo using the canvas board I would attach it to as a guide. I left some white as a boarder for the picture.

Then I painted the board with a layer of mod podge making sure I covered the entire board so there wouldn't be any air bubbles.

After letting that sit, I painted the front of the picture with mod podge. I did this quickly so the color wouldn't have time to bleed. I also made sure all the brush stroke were going in the same direction. I let it dry over night (it dried quicker than that but I had to help out my roommate with a project.) Taking an ultra fine point permanent marker, I wrote some of the lyrics in all lower case across the top and on the bottom of the picture in the white space.

Finally, I added the title of the song in white puff paint to the bottom of the picture. I set it aside to dry and voila!

Pictures will be added later tonight after I download them from my phone!

J Dawgs Hot Dogs Sauce

I went to college at BYU and just south of campus there is a little hut that sells amazing hot dogs**. They are huge and so good! Every time we visit Utah I make sure to swing by and pick one up! The thing that sets J Dawgs apart is the secret sauce. About 6 weeks ago I went searching for a recipe and I found a few that are close to the real thing. No they are not the real recipe but they taste good enough for living on the opposite coast!

 J Dawgs Sauce Recipe:
  • 3/4 cup ketchup
  • 3/4 cup brown sugar
  • 1/4 cup honey
  • 1 tsp. cider vinegar
  • 1 tsp. soy sauce
  • 1/2 tsp. onion powder

I have a few tips to add:
  1. Use bratwurst or another good thick hot dog. 
  2. Grill the dogs and toast the buns
  3. Use sauteed onions and peppers to add to the flavor
  4. Don't use any other sauce. 
  5. Cut the dogs up inside the bun so the sauce gets into the hot dog
  6. Prepare the sauce ahead of time and refrigerate 

I made bratwursts the other day for us and my in-laws and it was a huge hit. They were putting the sauce on their rice too!


**After looking this up I realized they now have two real store fronts and an awesome website found here. If you live close go! You can purchase this special sauce in stores.

Muy Facil Flowers (Very Easy Flowers)

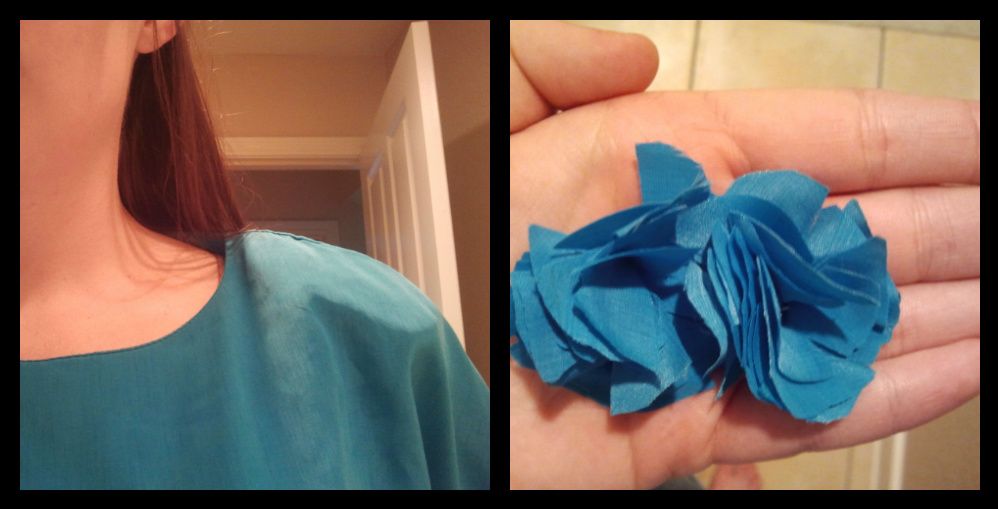
I'd like you to know, I take requests on occasion. One of our readers, Heather, asked in her comment on my thrifting post for a tutorial on how to make the flowers on my hair accessory. She asked, I am delivering!

Photobucket

My first attempt I made two flowers out of the shoulder pads from my totally tubular '80s top. The best thing about these flowers: they are scrap pile busters! Perfect for just a little bit of pretty fabric you have left. 

Photobucket
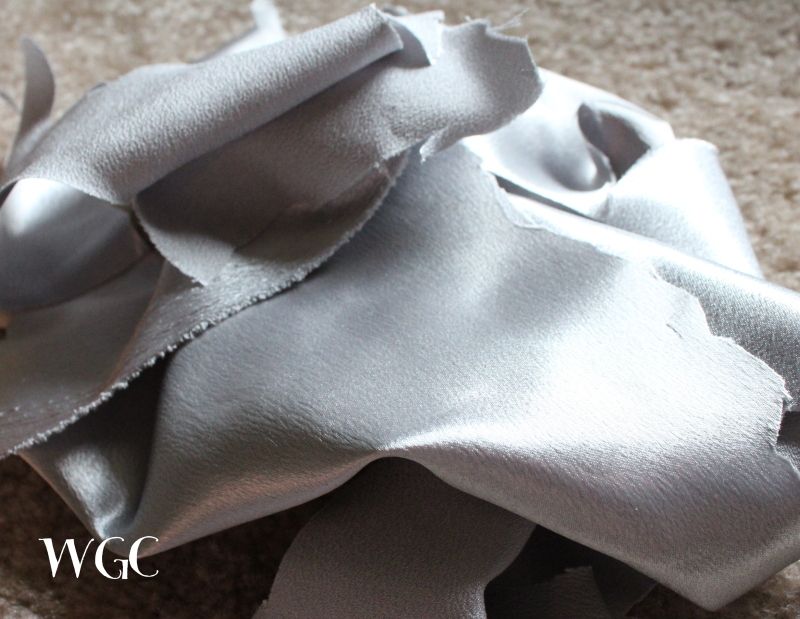
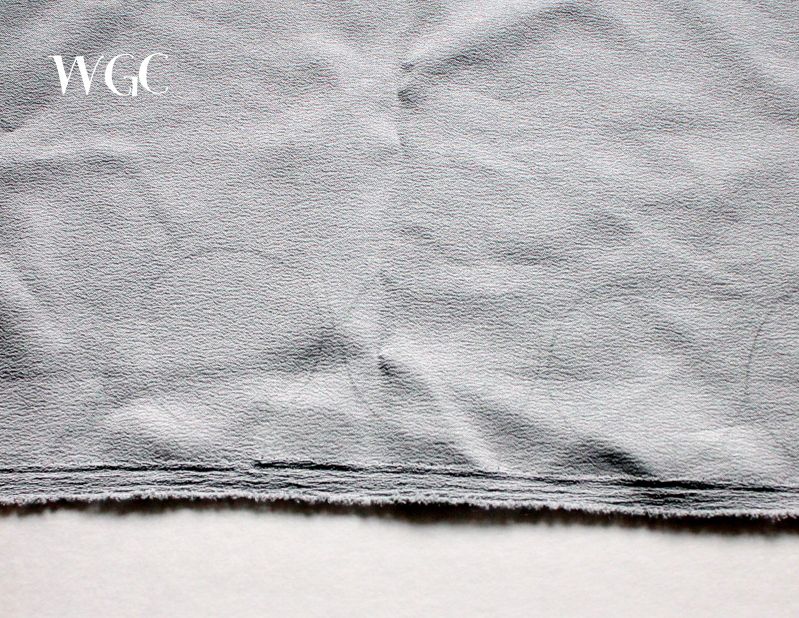
Start with some pretty fabric you can't bear to get rid of 

Photobucket

Trace circles onto the fabric. Between 4 and 6 circles seem to be best. 

Photobucket

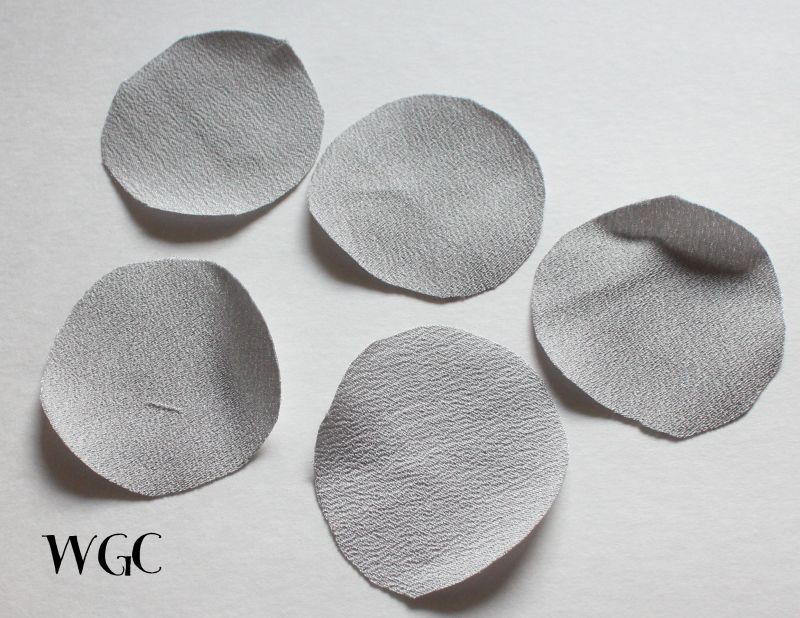
Cut out the circles. It's ok and almost preferable if they aren't perfect.

Photobucket

Stack the circles and while holding them between your pointer finger and thumb, cut slits around. The more slits, the puffier it will be. Twist the different layers so the slits aren't lined up. 

Photobucket

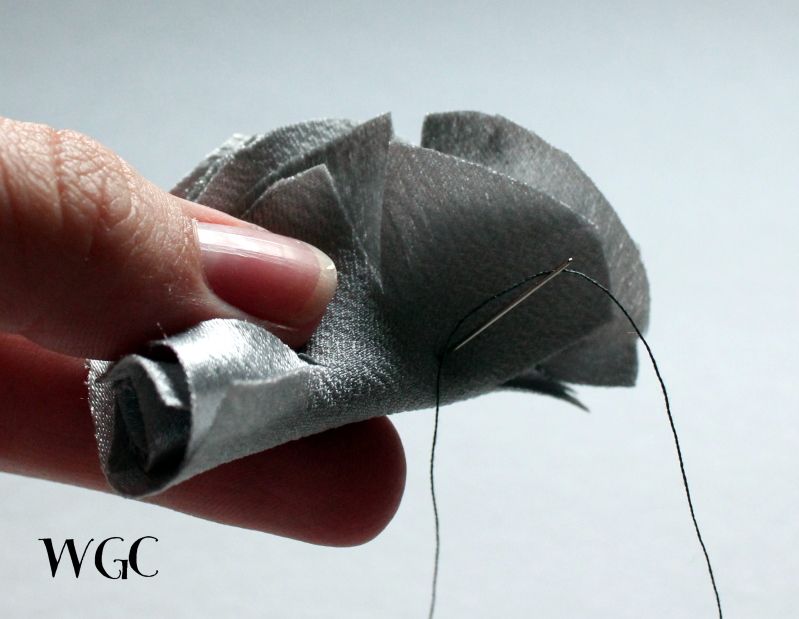
Fold the flower over and make several stitches, ensuring your needle goes through each layer.

Photobucket

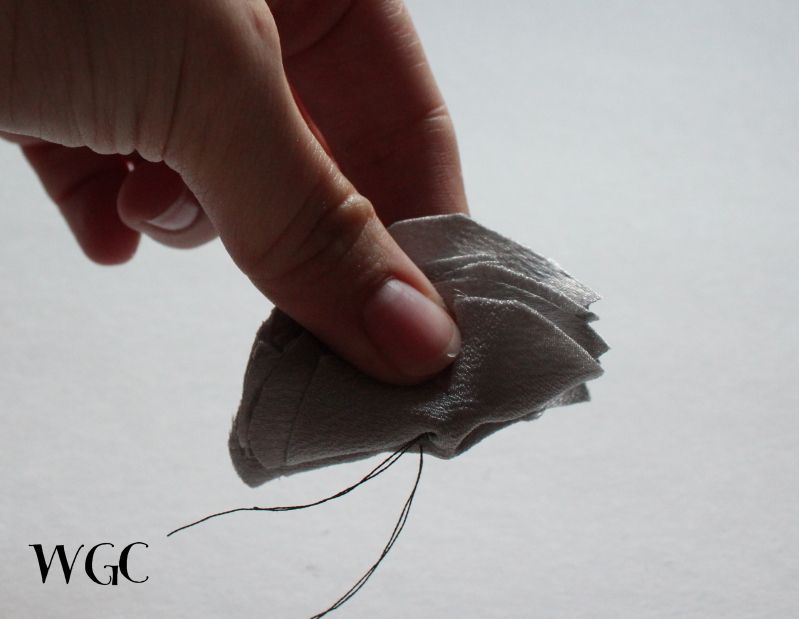
Then fold the flower the opposite way and stitch again.

Photobucket

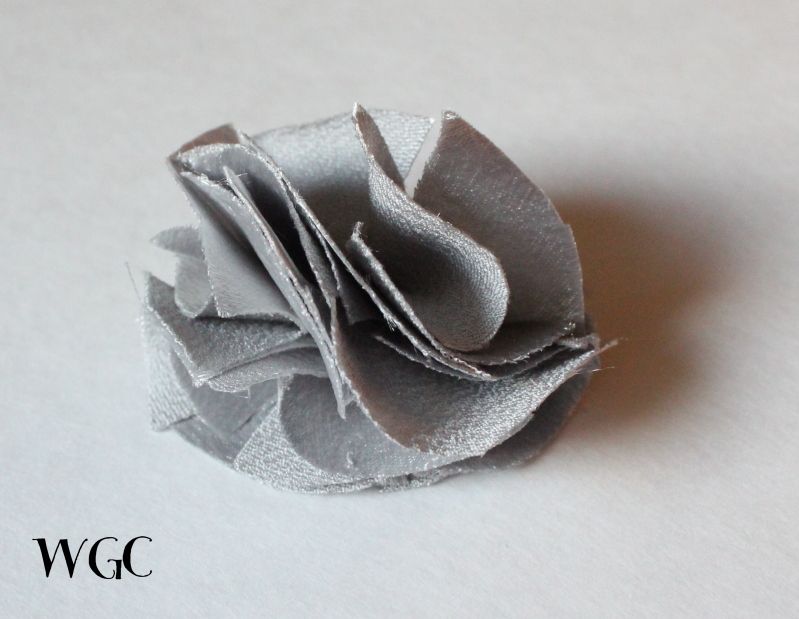
Voila! 

Photobucket

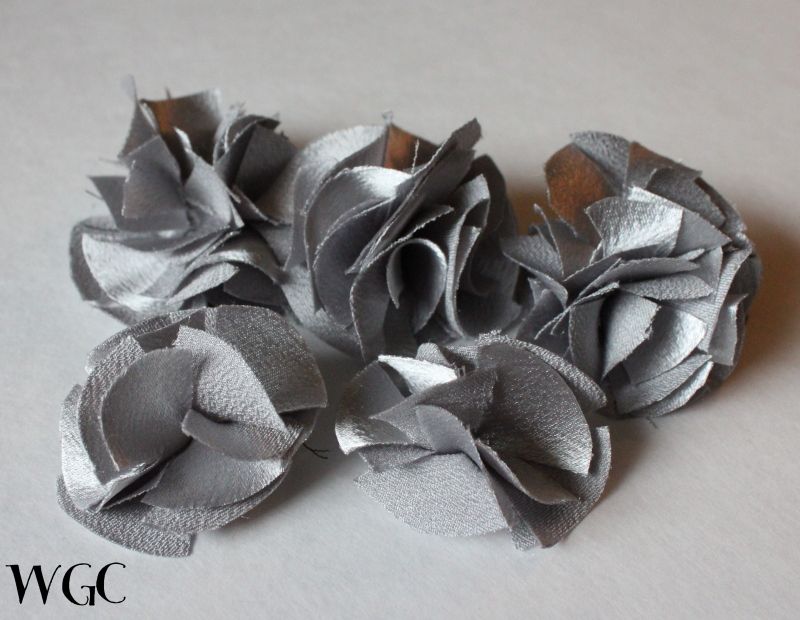
Here I have two different sizes. The ones in front needed more layers or more slits I think. The back ones I like more. 

These flowers are perfect for hair accessories,  brooches, and jewelry. 

Now go make ya some Muy Facil Flowers!!

The 30-minute, $5 Shrug shrug

(Yes, shrug shrug.)

Next month, I'll have the honor of presenting one of the 2011 Whitney Awards. I have a dress I really like, but it's sleeveless and a little too low in the back (we don't do sleeveless!). In the past, I've worn a beautiful pashmina-style scarf, but it's just a little too big for this event, and I really love the top and waist detail of the dress, which tend to get lost with a big coverup.

So I decided to sew a shrug. I looked for the easiest pattern I could find, and I came across Modest Prom's 30-minute, $5 shrug pattern. It's very easy (easier than it sounds from the description, or at least to me!) to sew, and it really did come together in 30 minutes or less. (Since I used a medium weight fashion knit, I didn't bother with hemming the edge.)

To make the shrug, you get 1/2 yard of 45" fabric, and sew the short ends together, right sides in (of course). Then you move that seam to the middle of the fabric "tube" and sew one long side together, starting and stopping 6" from either end. For added style, fold that last seam open and run a straight perpendicular line of gathering stitches in the middle of the last seam.

See? Sounds complicated, but it's really easy--I only had to sew 4 straight lines to make this! (There are also drawings on the pattern page that might help you.)

So why do I call it the "shrug shrug"? Because I can't really decide if I want to wear it. The sleeves are a little looser than I'd like, and the back covers up the waist detail I love so much. And I like the fabric--but I'm not sure I like it with this dress.


What to do?

What's your favorite way to stay modest?

Wall Display

I just returned from wonderful spring break with Jasmine and Jordan and her family. Jordan wrote about one of the discoveries we made down south, and now I will tell about something I found up north at my sister's house.
This is a picture of her wall decor. I plan to make one to go over my bed soon.


You need 9  sheets of  coordinating 12" x 12" printed scrapbook paper and about 4 sheets of a coordinating solid color
1/2" thick foam core board-- you will a need 3' square from which you will cut 9  one foot squares
Modpodge and something to hang the finished artwork.

Cut the solid scrapbook paper into 2 1/2" strips. Use these to finish the edges of  foam board squares with Modpodge as shown. Miter the corners.


Use the Modpodge to adhere the printed paper to the front of each square.

Sistor (that's what we call each other--- don't remember why!) used  Monkey Hooks to hang up her artwork. I think I will use Command Poster Strips. I will post a picture when I have mine completed.

Craft-A-Palooza: Shaving Cream Painting

This is my last Craft-A-Palooza! How sad. This one is very fun for both you and the kids. I got this idea from Little Wonders' Days. You need shaving cream, paint and card stock.
On a plate or a pan, get a nice layer of shaving cream. Smooth it out with a spoon or other utensil. Now here's the fun part.
Add some acrylic paint (any color and amount will do) and swirl it into the shaving cream. You don't need to do this too deep into the shaving cream. The marbleized it looks, the cooler you paper will turn out.
Now taking card stock or any sturdy paper, press it down into the paint and shaving cream design then pull it up carefully. Let it stand for a minute or so.
Next, using another piece of paper or squeegee, remove the paint and shaving cream.
 Your paper should now be tye dyed and ready for you to cut out fun shapes and patterns!


Wayward Tip: So I learned the hard way not to cut out the shapes and then dip your paper. I also learned when you are scraping off the excess paint and shaving cream, do it on one movement and in one direction. Also, use something bigger than the paper you are removing the extra off of...

Spray Painted Wreath


hehe do you see me in the reflection?
About a month ago I bought a grape vine wreath and some beautiful (fake) purple spring flowers. I debated for three weeks what to do to it. I had this pinned-well sorta. I went to look at the original link and the person before me only pinned the main blog not the actual post. It's okay though I used this pin to help me find it on her blog. Anyways back to my story- I was going back and forth between wanting to spray paint it or not and I had some extra white on hand so I went for it. To be honest with you I didn't love it at first but it has grown on me. I love the contrast with my newly BLACK door.

Spray painting it took very little paint and I didn't have to paint the back. It looks well covered though.

When you glue the flowers you can use two methods:
1) Take the flower apart and glue together each layer
2) Scrunch (yes, that's the technical term) the flower together and put glue around the base (see picture). Press the flower firmly and hold onto wreath. The glue will hold the flower together and hold it onto the wreath.

Glue it where the middle section holding the flower comes through the base.
I used the second option this time and it was easier but I couldn't tell if they were as secure. We'll see!
 
What do you think?

Ice Blue Starboard Skirt

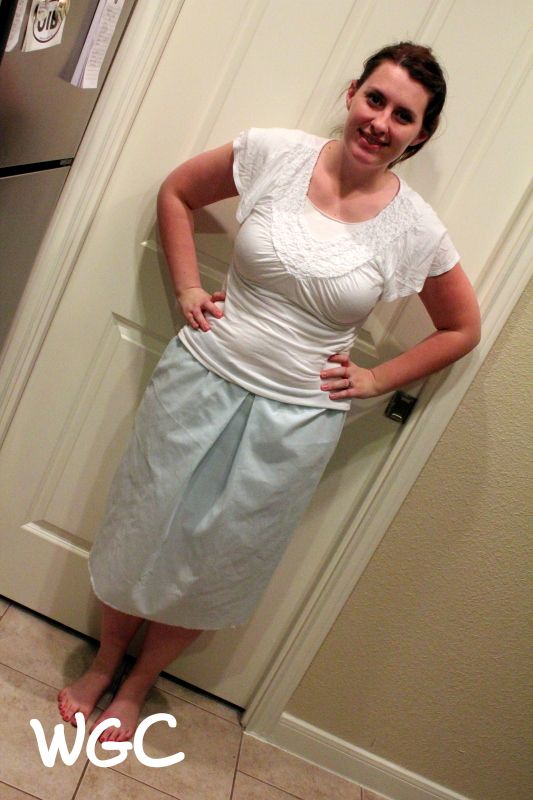
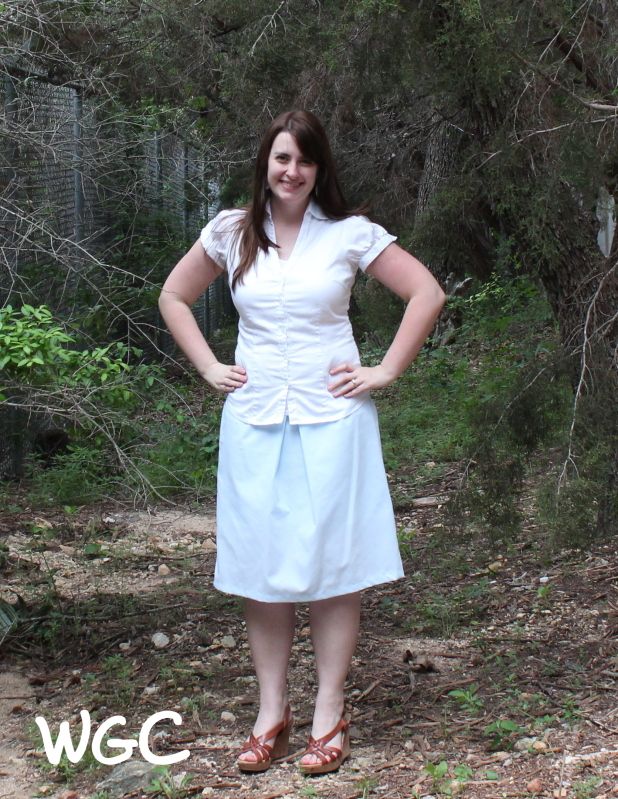
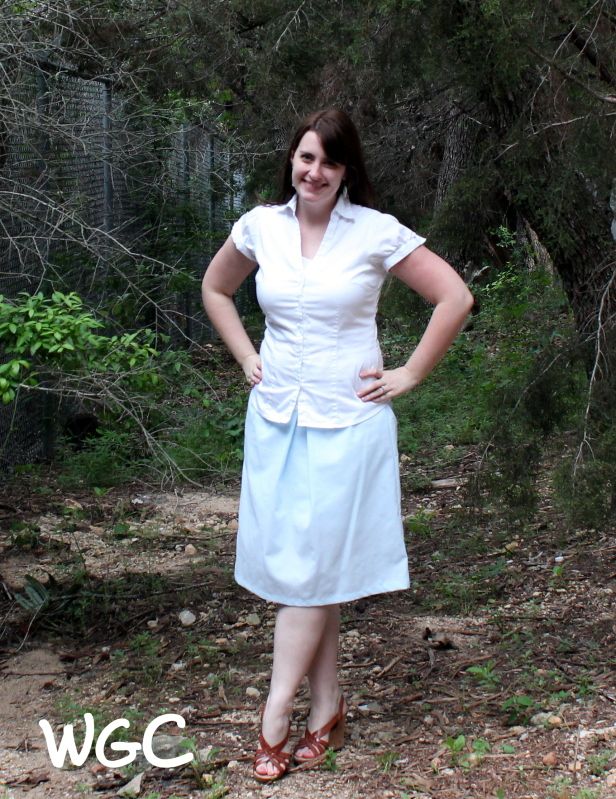
One thing I freely admit is my lack of sewing skills. But I do want to improve! So I found a skirt I wanted to try, Simple Simon & Co's Starboard Skirt. The tutorial I used is here: Simple Simon & Co's Starboard Skirt This was a simple skirt and not too frustrating, which is very important to me. The main design element is a pleat down the front.

 Here is me before I hemmed the bottom:

Photobucket

Here is the finished product:

Photobucket

Photobucket

My review: This skirt was simple enough to sew, but I'm not sure it's doing me a lot of favors in the hip department. Granted, the tutorial was meant for a girls' skirt so that might be something to take into consideration. The top of the skirt elastic. In the future, I want to try a tougher skirt, and not an elastic waistband.

What do you think? 
Related Posts Plugin for WordPress, Blogger...