Last Summer, Jordan shared this post at The Foley Fam. We liked it so much, we wanted to share it again!
Over the weekend, my sister Jasmine and I painted our nails. She does this all the time, but it's been years since I've bothered. (Sad but true.) When I was brainstorming ideas for my post, I wanted to do something to go along with my new pedicture. And then it hit me--spa flip flops!
They're quick and easy: just crochet a fluffy eyelash yarn onto the strap of your flip flops. But as I attempted to do that, I discovered it's a little easier said than done, especially if you're not much of a crocheter (I'm not). Once I figured it out, though, I made a quick video to show you! Instead of using eyelash yarn, I used an easier-to-see bit of scrap yarn to demonstrate the technique. (Pattons Simply Wool Stripes, if you're interested.) Don't adjust your sound--due to technical difficulties, this is a silent film.
After you make the slip knot, it's basically just a chain, except that you wrap the working yarn over, and then under, the flip flop strap between the stitches. Once you're done, be sure to turn the stitches to sit on top of the strap. For a fuller or poofier effect, you can bunch the stitches together (that will take more yarn and more stitches, of course).


Spa Flip Flop Makeover!

Posted by
Jordan McCollum
at
7:57 PM
3 comments
:
 Labels:
crochet
,
flip flops
,
Jordan
,
makeover
,
redo

Fancy Wrapped Gifts
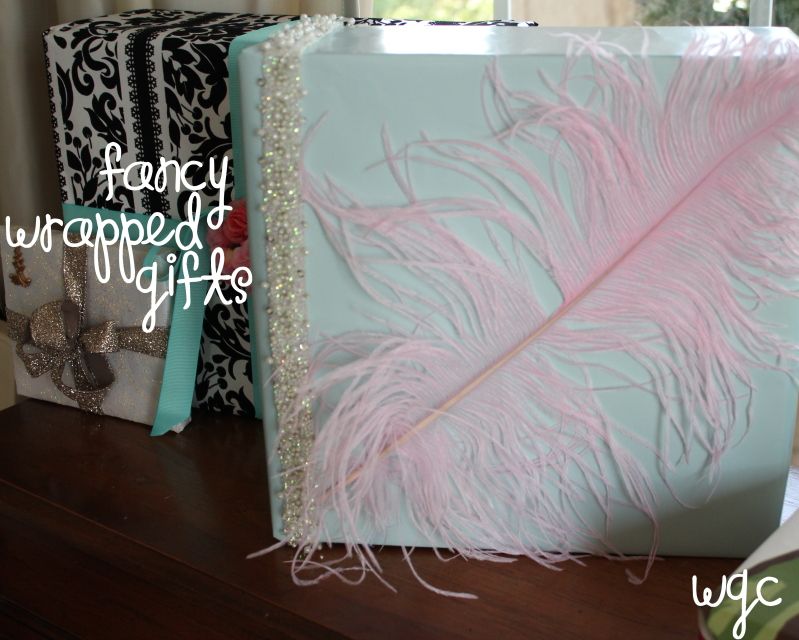
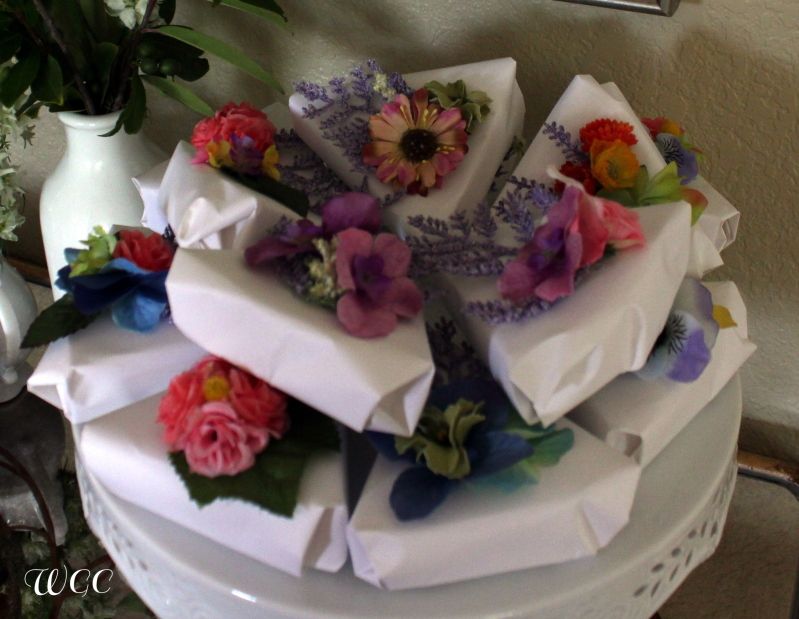
I'm guilty of wrapping presents rather plainly. Thank goodness for my friend Anne teaching me a better way. I give you: Fancy Wrapped Gifts!
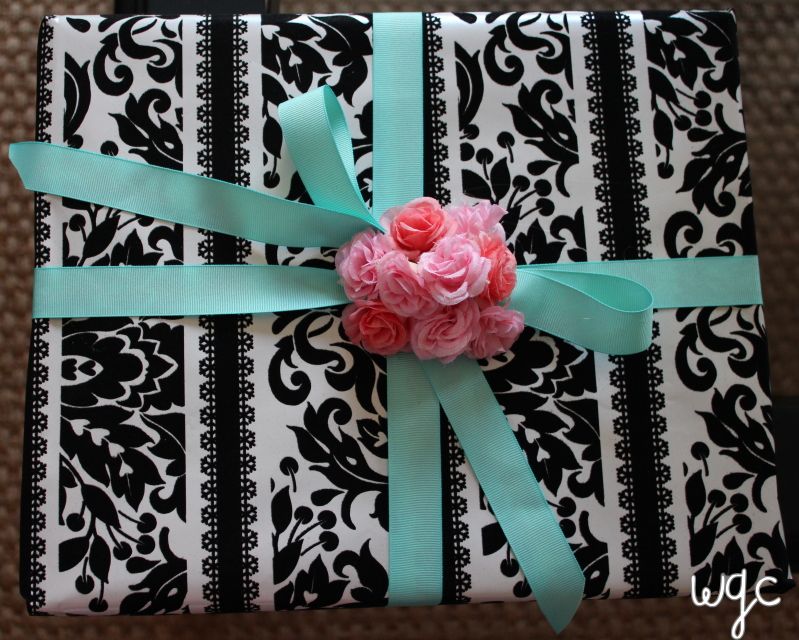
The wrapping paper is very pretty, but doesn't say a little girl's birthday. What it needed: ribbon and flowers!
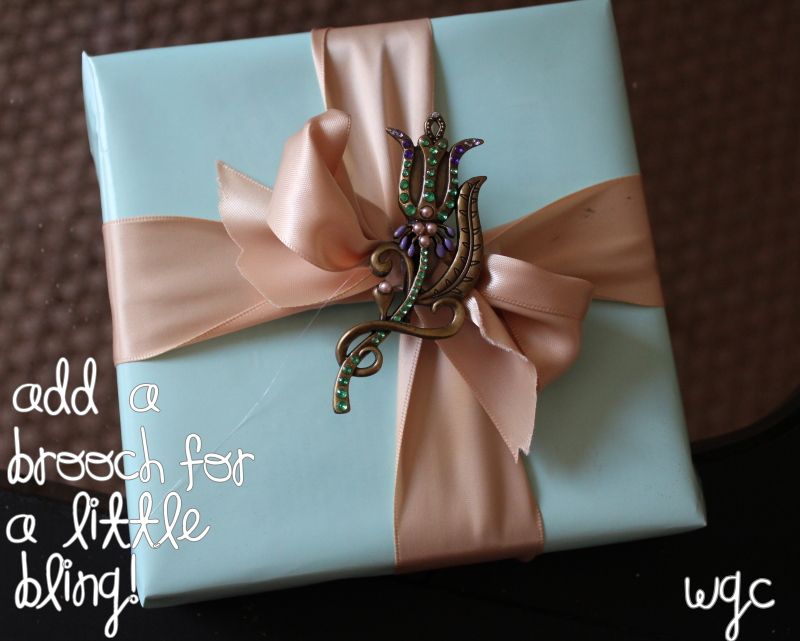
A brooch adds bling to any gift and can be used over and over!
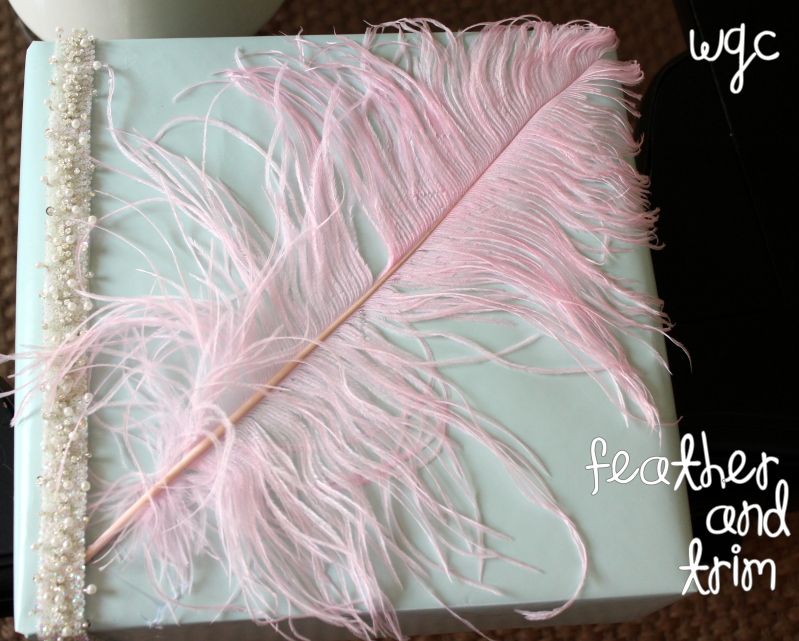
This gift is my favorite! A large feather was added as well as fabric pearl trim. Both are reusable!
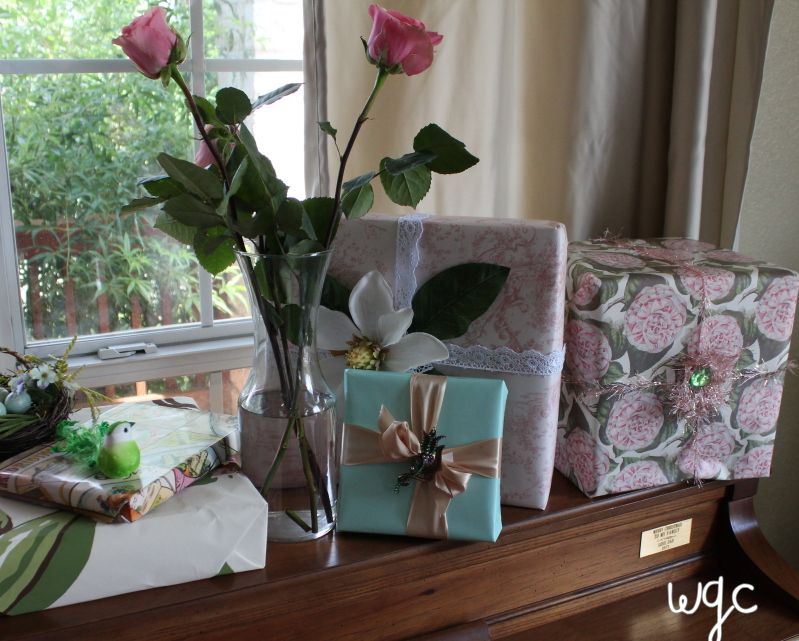
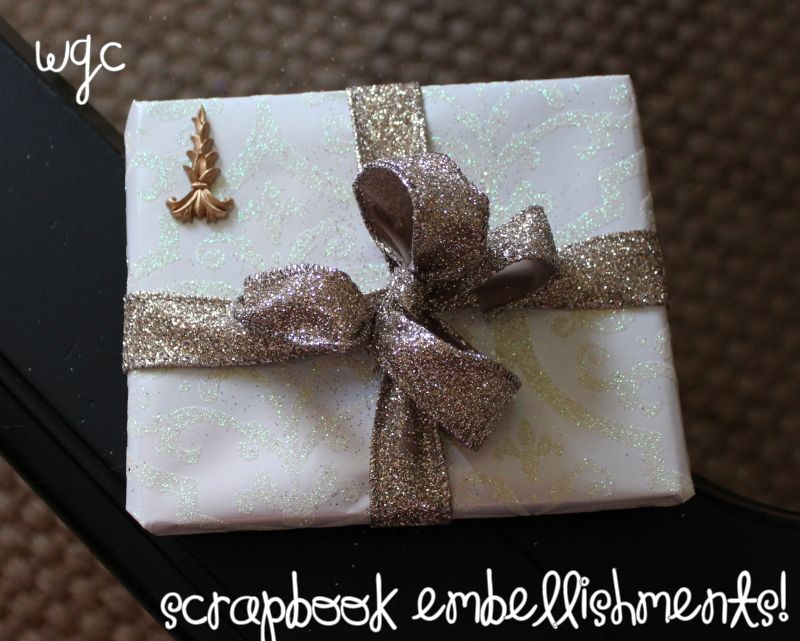
I have another friend who only buys white wrapping paper and dresses it up for any occasion with ribbon, bows and other embellishments.

The wrapping paper is very pretty, but doesn't say a little girl's birthday. What it needed: ribbon and flowers!

A brooch adds bling to any gift and can be used over and over!

This gift is my favorite! A large feather was added as well as fabric pearl trim. Both are reusable!

I have another friend who only buys white wrapping paper and dresses it up for any occasion with ribbon, bows and other embellishments.
More ideas of items to dress up gifts:
Jewels
Lace
Two types of ribbon on the same gift
Twine
Vintage keys
Miniature birds or another animals
Buttons
A flower hair bow (doubles as a gift!)
Fabric trims
Polymer clay shapes or gift tags
Beads or charms
Do you have any more fancy wrapping ideas? We'd love to hear them!

Raspberry Key Lime Cheesecake Shakes
Thank you to everyone who has sacrificed for our freedoms this Memorial Day.
Last week, my husband and I both saw an article in the paper about milkshakes, and the same recipe caught our eyes: raspberry key lime cheesecake shakes. We knew we had to try that one! So one night after the kids went to bed, we gathered the ingredients (kind of) and got to work.
Raspberry Key Lime Cheesecake Shakes
Servings: 2
Original recipe:
| Our variation:
|
In our variation, we didn't have fresh raspberries available as readily (or maybe cheaply) as frozen ones, so we substituted. That (or maybe the original recipe?) made the milkshake very thick--almost too thick--so I think we'd recommend adding some milk if you're not looking to get a hernia from trying to drink this through a regular straw.
Also, a chunk of cream cheese and a splash of lime juice do not a cheese cake or key lime pie make. Our first taste of the milkshakes were flat-out not sweet. No, not "not sweet enough"--not sweet at all. We added some xylitol, but we'd recommend adding sugar or the sweetener of your preference before blending.
Enjoy!
What are you having for dessert for Memorial Day?

Posted by
Jordan McCollum
at
9:22 AM
5 comments
:
 Labels:
cheesecake
,
Dessert
,
food
,
ice cream
,
Jordan
,
lime
,
raspberry
,
Recipe
,
shakes

Two for the Price of One
 In addition to enjoying crafting, we wayward girls also love reading. I double my pleasure by reading novels about crafters! This is a new and growing sub-genre. There are series about lots and lots of crafts. (I just read one about a button collector!) Here are some books that I have really enjoyed. I like mysteries, so several of these are mystery series.
This was the first book I read by Jennifer Chiaverini. She writes the Elm Creek Quilters books. (Actually I listened to it while I walked. It made me want to walk more.) I loved it! This is one of those books that tells the stories of 4 or 5 people whose lives intertwine at the end of the book. Several women apply for the position at a quilting camp (that I want to go to!) There is a whole series of books that span generations in a family. She has also published quilt pattern books.
 Another quilting series that I enjoy is by Marie Bostwick. This book is also told from the point of view of several characters who work or shop in a quilt shop.
 I just discovered this scrapbooking series that is pretty good. I am not a big scrapbooker, but I enjoy reading about life in a scrapbook shop. After every few chapters, there are directions on how to do a special project or technique. I plan to try some of them. I am pretty excited right now because I saw on Amazon there are several books in the series that I haven't read yet.
This is the Kiki Lowenstein series by Joanna Campbell Slan.
 Even though Jordan and Brooke can both knit, I can't at all. But after reading these books, I kind of want to try again. These are set in Fort Collins, Colorado. I have learned all about knitting and spinning wool by reading them.
This one is the 5th book in the series by Maggie Sefton. The all have clever titles.

This book by Laura Childs is also about scrapbooking. I didn't like it as much as the other series, but it is ok.
One other sub-genre that is huge now is cooking novels. I won't go into those, but if you like cooking and reading, try these authors: Joanna Fluke or Diane Mott Davidson. The stories are fun and they have some interesting recipes, too.
So how do you find these books? Most libraries have online search engines. Just put in the craft that you like and the word novel or fiction and see what pops up. Let me know if you find some that you love!


Which of your craft supplies are a necessity?
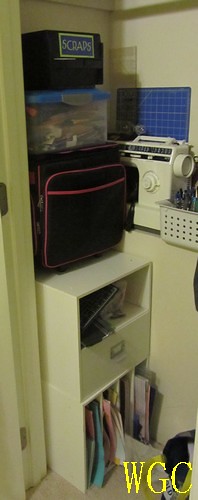 So unlike awesome my sister, I hold onto craft supplies with no intention of ever letting any of it go. I have tried and tried to keep it all organized but it's always a mess. Therefore I wasn't surprised when recently I had to pack it all up :( You see our house is on the market and when the home stager came through she asked me if it was vital if it stayed staged as a craft room and office. As my mouth said "No, I can pack it all up," my heart said "NO WAY! ARE YOU CRAZY?!" How will I make cute things for my church responsibilities or need to make a card? So to get away with keeping some stuff out I got creative with my storage. The space is very limited and I had a hard time coming up with what to keep out. Overall I kept out:
- My paper and paper cutter
- My sewing machine and basic supplies
- My general crafting supplies
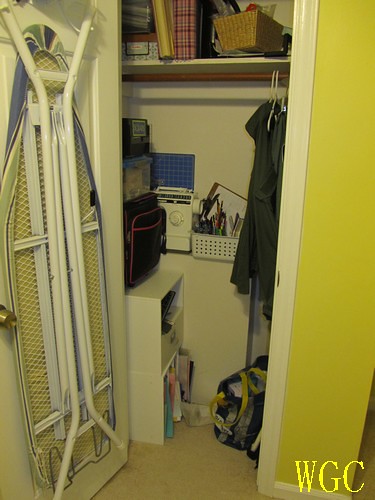
What would you keep out? I'm crossing my fingers that be reunited with my stuff soon.

Posted by
Brave Brooke
at
8:17 PM
4 comments
:
 Labels:
Brave Brooke
,
Craft stash
,
organization
,
staging

Tea Party Birthday
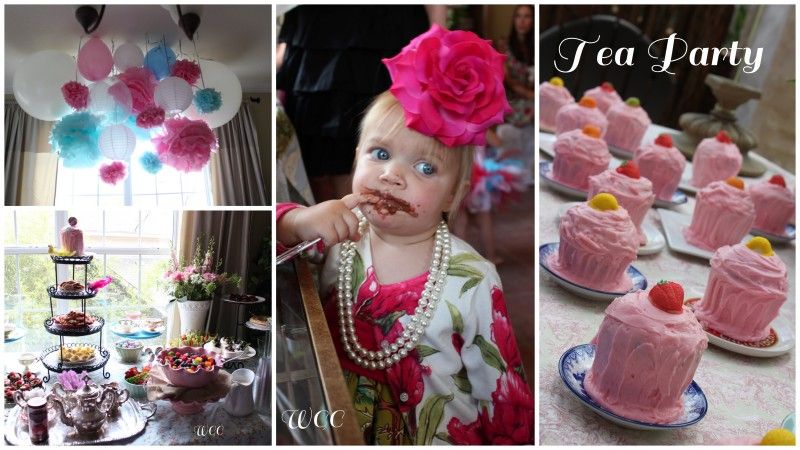
My good friend, Anne, threw an amazing party for her daughter's first birthday. The theme was Marie Antoinette "Let Them Eat Cake" tea party. I got to help a little with the decorations and food.
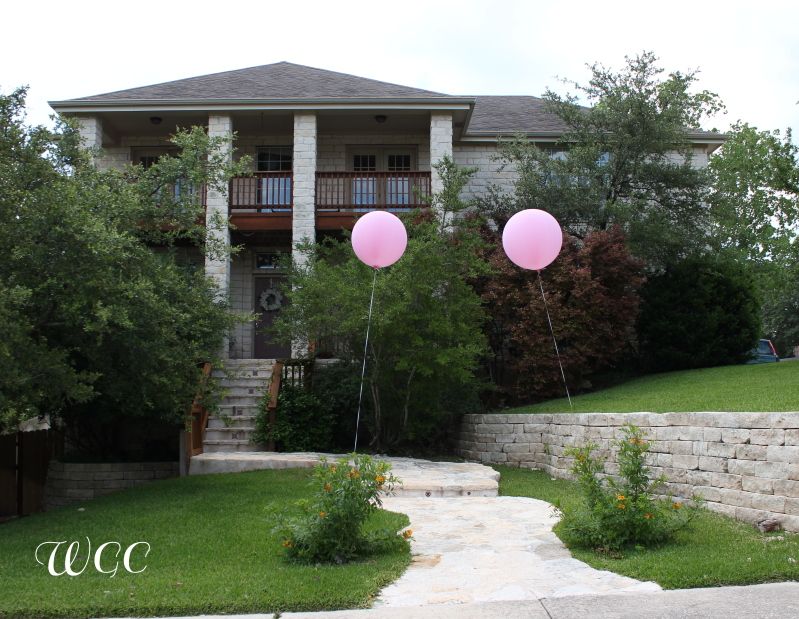
Huge balloons greeted the guests
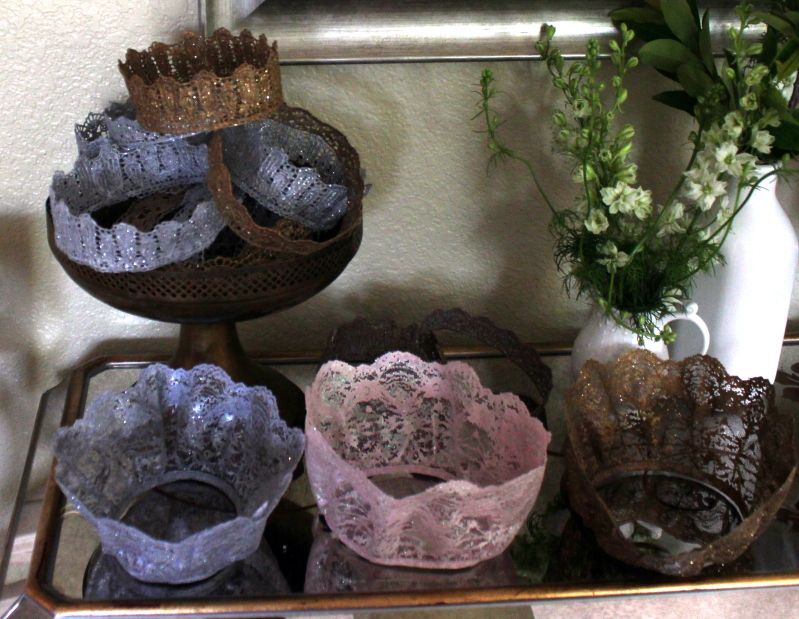
Inside, they had their choice of lace crowns (tutorial here)
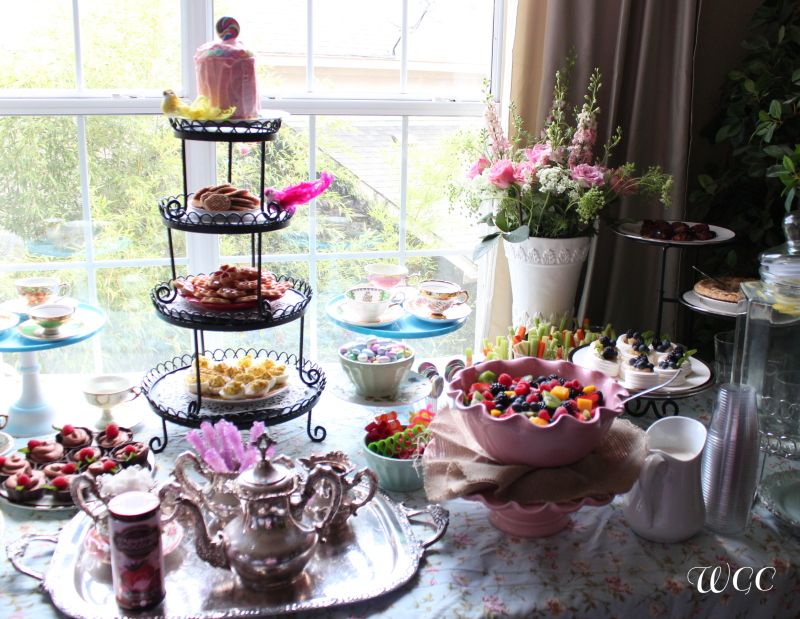
Here's part of the spread. Food included: Cucumber sandwiches,
croissants, cheese and crackers, mini chocolate shells filled with chocolate mousse, cookies, deviled eggs, quiese, fruit and vanilla sauce, veggies, candy, tea, meringue with lemon curd, prosciutto wrapped dates, and quiche.
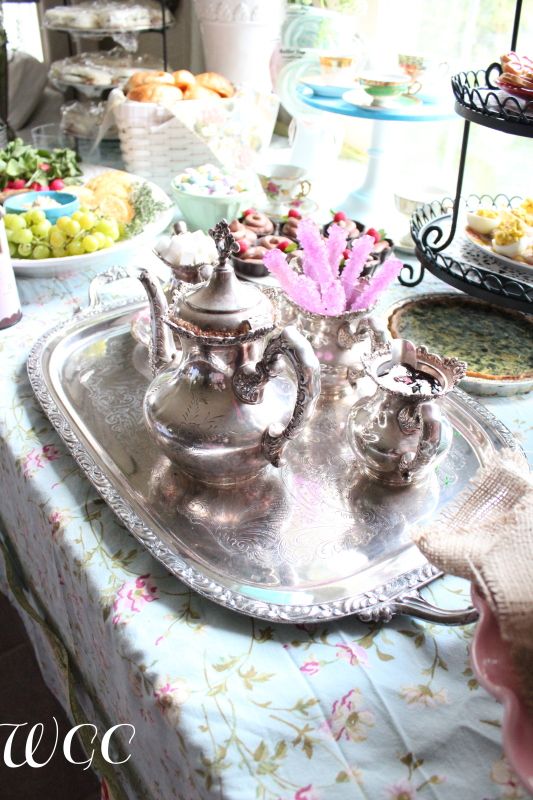
Vintage silver tea set. Inside the pot there was milk and the small pitcher had strawberry syrup. I had some in a tea cup; YUM!
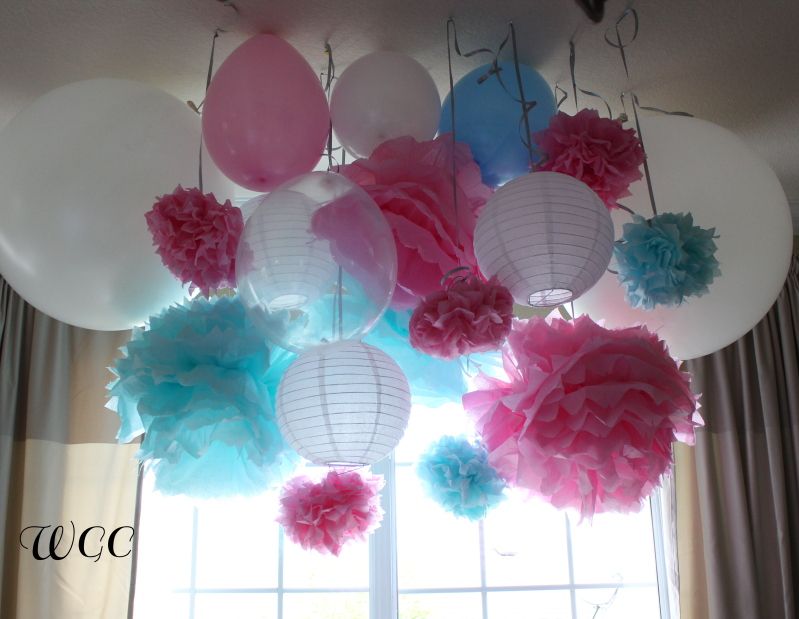
The hanging pom ball/balloon/lantern display above the food table. Huge impact for really cheap!
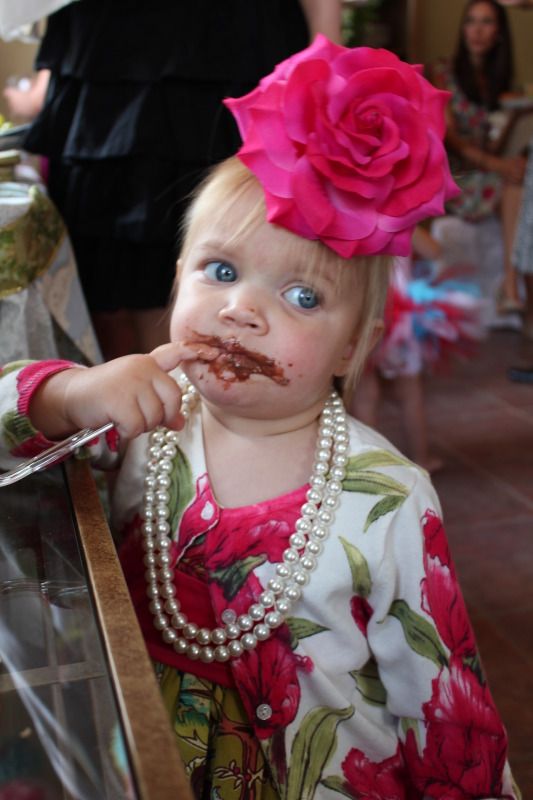
Here's the birthday girl, enjoying the mousse I made. Isn't her ensemble amazing?
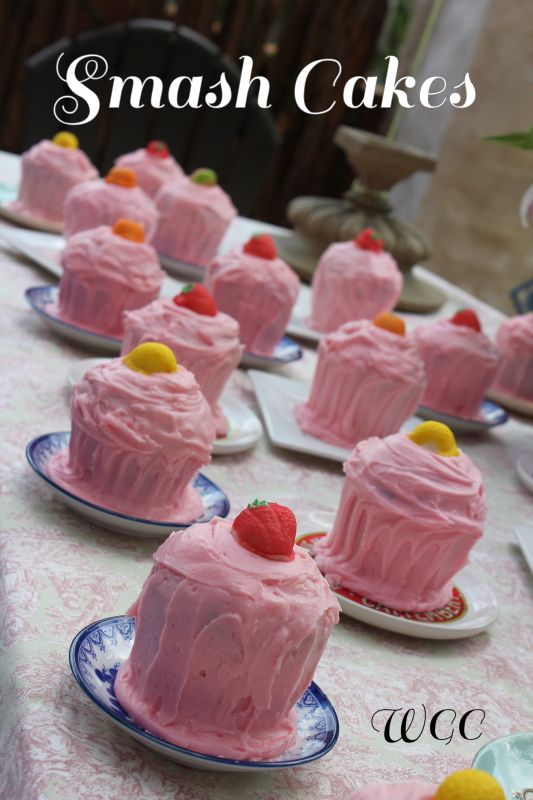
These are the individual smash cakes for each child, topped with a marzipan fruit. The frosting was so tasty!
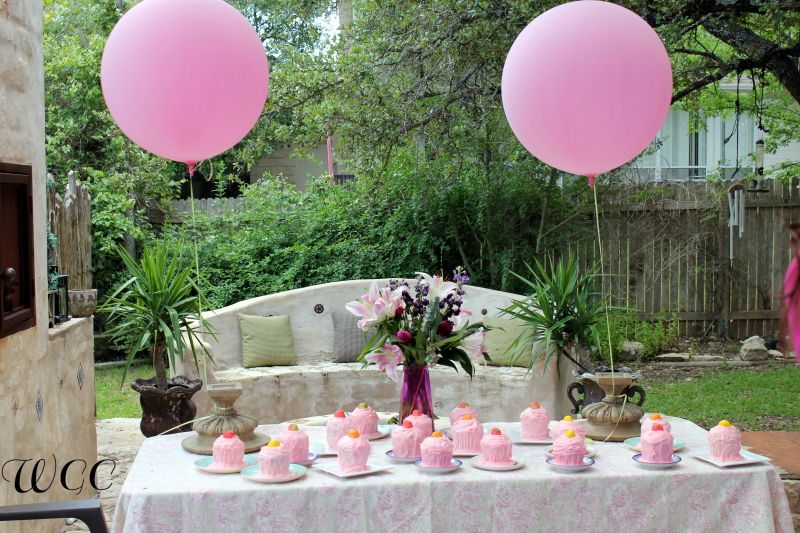
The table in the backyard, perfect place to smash your cake and make a mess. More huge balloons too!
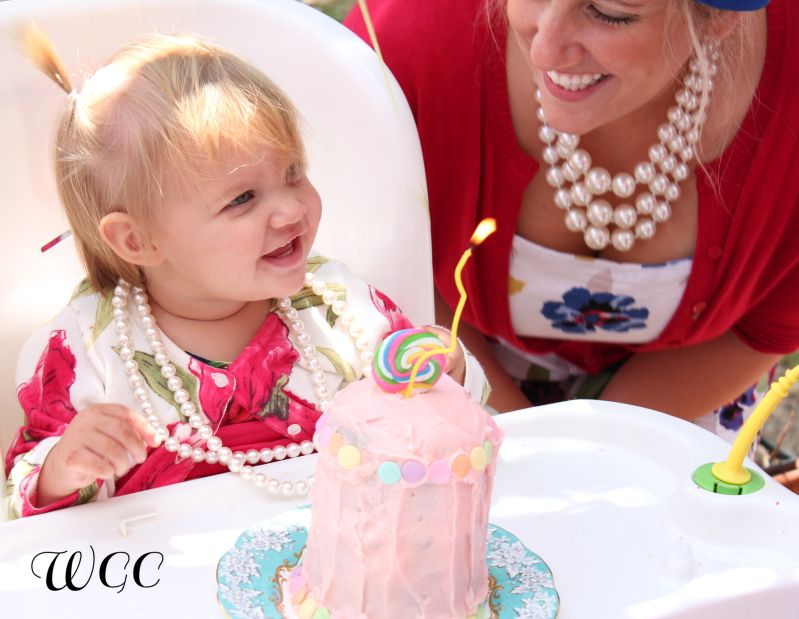
Isn't this a great picture of Anne and the birthday girl? This is right after we sang to her.
These were the dainty favors for each of the guests. Inside were cookies.
I can't wait for the next party!

Posted by
Just Jaime
at
6:00 AM
10 comments
:
 Labels:
birthday party
,
cake
,
food
,
Holidays and Entertaining
,
huge balloons
,
Just Jaime
,
lace crowns
,
party
,
pom balls
,
puff balls
,
smash cake
,
tea party

Modest makeover: 50¢ shirred maxi dress!
I seldom get up early enough to go yard saling, but a few weeks ago, our church and our school were holding yard sales just a couple blocks apart, so our family made an effort to hit them both. One of the things we picked up was a cute shirred-top dress. The back tag was ripped out, but I suspect it's not really supposed to be a little girl's maxi dress (probably a medium girl's knee-length dress?).
It was a little big for my daughter (and I wouldn't let her wear a strapless dress to church)(especially not one that would fall down!), so I wanted to add sleeves to help it fit her better.
Matching the fabric wasn't an issue: the tiered skirt also had another layer of the same fabric underneath.
I had my daughter try on the dress, and I measured from the side seam to what seemed like a good point in the front to get the width, about 4 inches. I made sure that width would cover her shoulders, too. Using a rotary cutter, I cut 4 inches off the bottom part of the underlayer of the skirt. The fabric is a gauzy-type cotton weave, so I did a fake overlock stitch (a zigzag stitch along the edge) to minimize fraying.
I took my extra fabric and cut it in four pieces. Then I failed to pin right sides together and totally messed up sewing those pieces together. (Hooray! Wayward! As if breaking yet another needle wasn't wayward enough!) I wanted to make a double-wide fabric so I could gather it to help match the dress, and I would use the presewn rolled hems instead of having to sew my own. But I wasn't careful about which way the hems were facing, and three of them ended up facing out. (Seriously?!)
 I gathered the ends of the sleeves and sewed them along the top edge of the front, then had another fitting with my daughter to get them the right length before sewing them in the back. (I mean, I wish I'd done it that way. I really kept it all pinned during the fitting and it was a big hassle.)
My daughter is happy with the result (but she wasn't happy I interrupted her during her favorite show to take pictures!). When I wash it, the gathers will take on the same wrinkly appearance as the rest of the dress. I love that they totally look like they belong, and it was WAY easier than cutting out a real sleeve pattern and all that entails.
Best of all, total bill for the project: $0.50!
What are your weekend thrifting finds?
It was a little big for my daughter (and I wouldn't let her wear a strapless dress to church)(especially not one that would fall down!), so I wanted to add sleeves to help it fit her better.
Matching the fabric wasn't an issue: the tiered skirt also had another layer of the same fabric underneath.
I had my daughter try on the dress, and I measured from the side seam to what seemed like a good point in the front to get the width, about 4 inches. I made sure that width would cover her shoulders, too. Using a rotary cutter, I cut 4 inches off the bottom part of the underlayer of the skirt. The fabric is a gauzy-type cotton weave, so I did a fake overlock stitch (a zigzag stitch along the edge) to minimize fraying.
I took my extra fabric and cut it in four pieces. Then I failed to pin right sides together and totally messed up sewing those pieces together. (Hooray! Wayward! As if breaking yet another needle wasn't wayward enough!) I wanted to make a double-wide fabric so I could gather it to help match the dress, and I would use the presewn rolled hems instead of having to sew my own. But I wasn't careful about which way the hems were facing, and three of them ended up facing out. (Seriously?!)
 I gathered the ends of the sleeves and sewed them along the top edge of the front, then had another fitting with my daughter to get them the right length before sewing them in the back. (I mean, I wish I'd done it that way. I really kept it all pinned during the fitting and it was a big hassle.)
My daughter is happy with the result (but she wasn't happy I interrupted her during her favorite show to take pictures!). When I wash it, the gathers will take on the same wrinkly appearance as the rest of the dress. I love that they totally look like they belong, and it was WAY easier than cutting out a real sleeve pattern and all that entails.
Best of all, total bill for the project: $0.50!
What are your weekend thrifting finds?

Triptych Completed
This week I finished up (mostly) my triptych. I like how it turned out!
I couldn't get rid of the glare. The blue is actually more of a denim blue.
Here are some close ups of the third piece. I couldn't get rid of the glare.
For the middle piece, I made a collage (which I loved and hated to see go!) and then masked off the tree. Then I gave it a good coat of paint followed by modpodge.
I haven't hung them up yet, but I will.
Maybe I will try for some better pictures later--
til then, enjoy.

Chocolate Party
I have one roommate who is sensitive to chocolate...in a bad way. We can't even have it in the kitchen, the poor thing! She went out of town for Mother's Day and we knew it was our chance to overindulge in chocolate. Now, this isn't really a craft but I knew I had to write about it this week.We decided to throw a chocolate party. At church we invited everyone. We invited the apartments on our floor. We texted a bunch of friends. We wanted everyone to come. So then came the making of all the chocolatey goodness. We told people to bring goodies if they wanted to as well. We didn't really know how many people would come since we invited everyone and their mother it seemed so we just guess at how much we needed to make. We made a chocolate cake with chocolate frosting of course. Some Brazilian chocolatey caramel things. Some more Brazilian cookie things (can you tell I have a Brazilian roommate and that I don't know what they were called?) A chocolate Oreo pie topped with whipped cream and raspberries. We cut strawberries in half, dipped them in milk chocolate and then drizzled white chocolate. Those went the fastest. And we made no bake cookies. Some people brought brownies and another chocolate cake and some pudding delicious thing. It was a huge success! Around 50-60 people visited our small apartment. Good thing we pushed our furniture back to make it more roomy! We had an entire chocolate cake left over so we cut it up and gave some to our neighbors who didn't make it. Then we had to scrub the chocolate off our floor and counters before our roommate got home Monday night...but we waited until Monday afternoon to do all that!


Mini Red Velvet Cupcakes with Homemade Cream Cheese Frosting
This past weekend I made some cupcakes for Mother's Day and a picnic for my husband's work. I still had plenty left over afterward. I may have eaten more than my fair share but hey they're mini so that's mini calories, right?
For mini cupcakes mix together recipe as it says on the box. Bake for 10-13 minutes at 400 degrees. Recipe makes 6 dozen mini cupcakes. To help with pouring the cupcakes I put the mix in a measuring cup with a pour spout.
Beat cream cheese until smooth in a medium bowl. Add butter until fluffy. Add vanilla then add powdered sugar 1/4 cup at a time.
The cupcakes cool quickly after they are taken out of the tin. I took mine out with a spoon so I didn't burn my fingers. When they are cool pipe on swirl of frosting. I used a plastic baggie with the corner snipped off because I didn't have any pastry bags. I started making the frosting as the last batch went in the oven and it was perfect timing.
Duncan Hines Red Velvet Cake mix
Water
Eggs
Oil
For mini cupcakes mix together recipe as it says on the box. Bake for 10-13 minutes at 400 degrees. Recipe makes 6 dozen mini cupcakes. To help with pouring the cupcakes I put the mix in a measuring cup with a pour spout.
Homemade Cream Cheese Frosting
8 oz. cream cheese (softened)
1 stick butter (softened)
1 Tbsp vanilla (I would use clear vanilla for this)
3-4 cups powdered sugar
The cupcakes cool quickly after they are taken out of the tin. I took mine out with a spoon so I didn't burn my fingers. When they are cool pipe on swirl of frosting. I used a plastic baggie with the corner snipped off because I didn't have any pastry bags. I started making the frosting as the last batch went in the oven and it was perfect timing.
They were delicious and I plan on making them again!

Posted by
Brave Brooke
at
9:00 AM
4 comments
:
 Labels:
baking
,
Brave Brooke
,
cream cheese frosting
,
cupcakes
,
food
,
mini cupcakes
,
Recipe

Super Simple Pencil Skirt
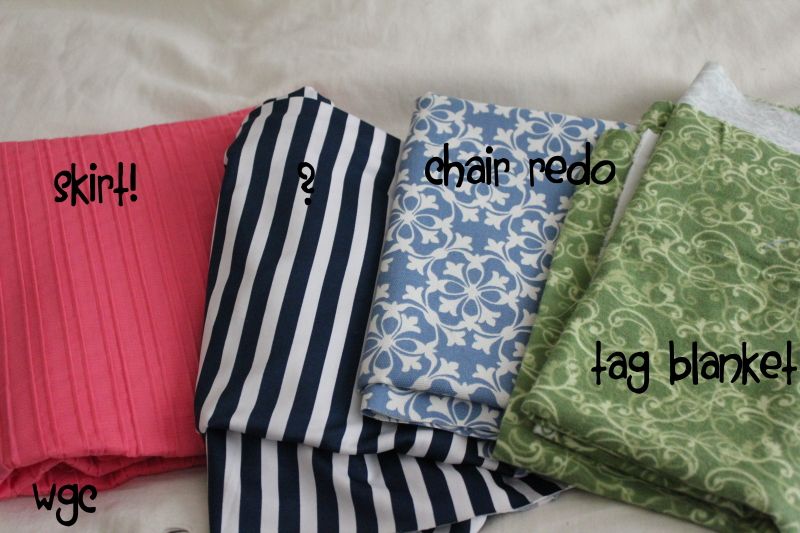
A long time ago I bought this fabric:
On Saturday, I was finally read to make something with this fabric. I decided on Cotton and Curl's Pencil Skirt from Scratch, Baby! as a guide but I changed mine a little.
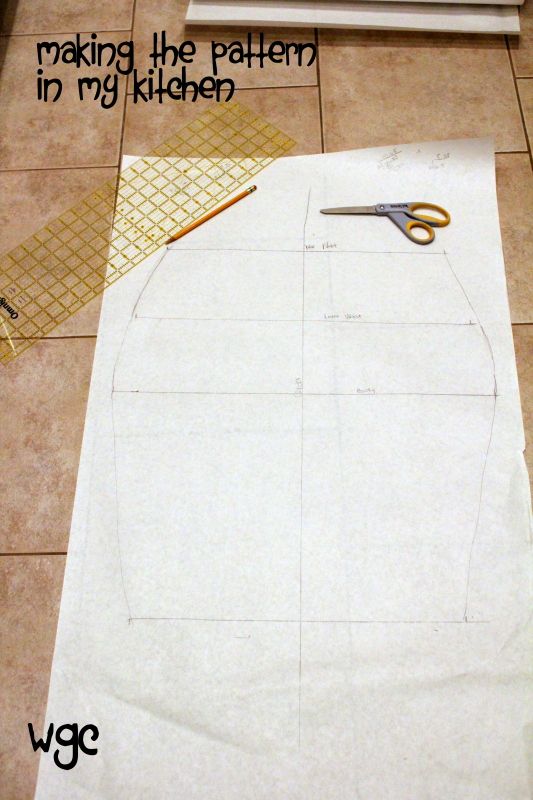
I took my measurements: natural waist, lower waist, booty, knees, natural waist-->knees. I did as the tutorial stated and added an inch to those measurements, except for the length--I added two inches at the bottom for a hem. Then I made my pattern on a big roll of paper:
I worked in my kitchen because it has the best lighting and no carpet!
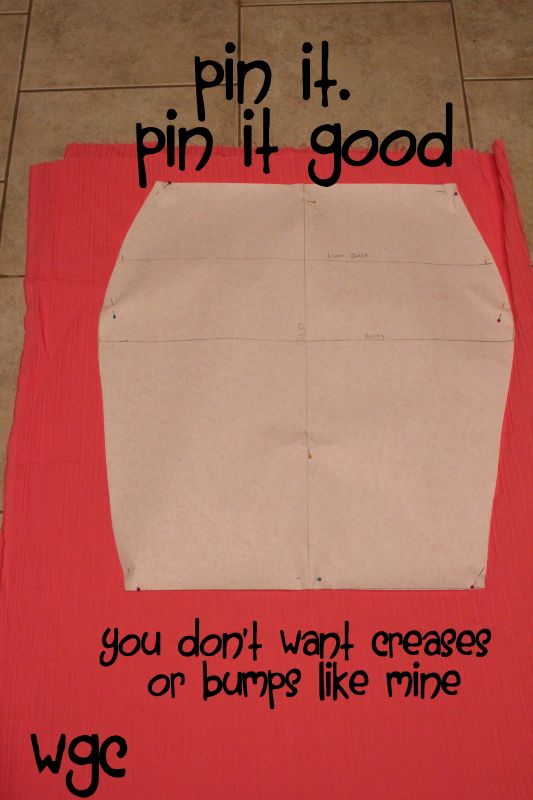
Then I pinned the pattern to my folded fabric, making sure the pins went through both layers of the fabric and didn't have bumps or creases (I fixed it after this picture). Bumps can make the fabric uneven when cutting and cause weirdness in your cut piece.
Then I wore it to church on Sunday:
The coral fabric on the left is the one I used for this project. (Chair Redo, Tag Blanket)
On Saturday, I was finally read to make something with this fabric. I decided on Cotton and Curl's Pencil Skirt from Scratch, Baby! as a guide but I changed mine a little.
I took my measurements: natural waist, lower waist, booty, knees, natural waist-->knees. I did as the tutorial stated and added an inch to those measurements, except for the length--I added two inches at the bottom for a hem. Then I made my pattern on a big roll of paper:
I worked in my kitchen because it has the best lighting and no carpet!
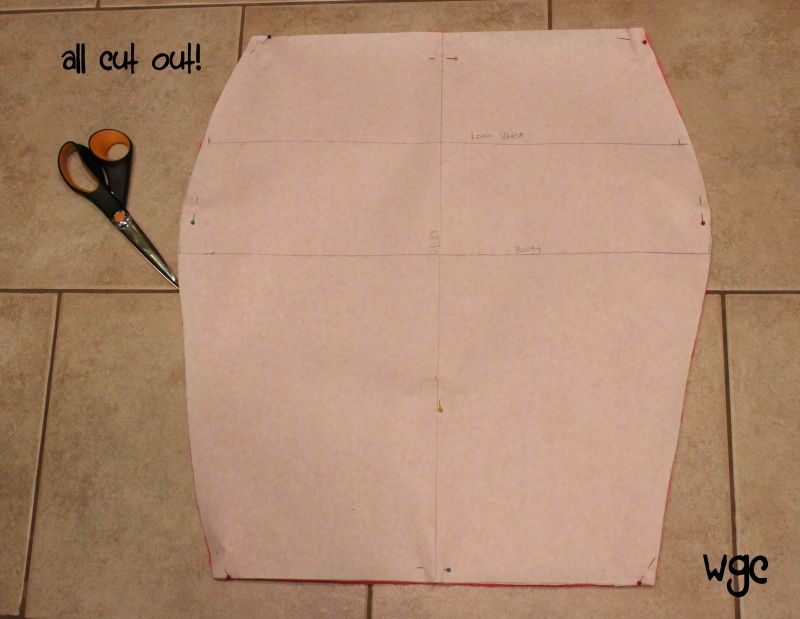
I drew a line down the center of my paper. Then I took my waist measurement + seam allowance and divided by two, then divided by two again. That's how much should go on either side of the center line. I marked that on the paper and drew a straight line across with the words "Natural Waist" just in case I forgot. I repeated the process for each of the measurements and then drew the outline of what I wanted the skirt to look like. Then I cut the paper pattern out.
Then I pinned the pattern to my folded fabric, making sure the pins went through both layers of the fabric and didn't have bumps or creases (I fixed it after this picture). Bumps can make the fabric uneven when cutting and cause weirdness in your cut piece.
Using my super sharp scissors (Thanks, Mom!) I cut out the pattern.
I sewed a short hem on the waistband and then sewed the two two pieces together. Finally, I tried it on to see where I wanted the bottom hem and hemmed it twice, for a more finished look. Meaning, I folded and ironed 1 inch all the way around, then sewed that. Then I folded and ironed another inch and sewed that so the raw edge wouldn't be seen at all. Make sense?
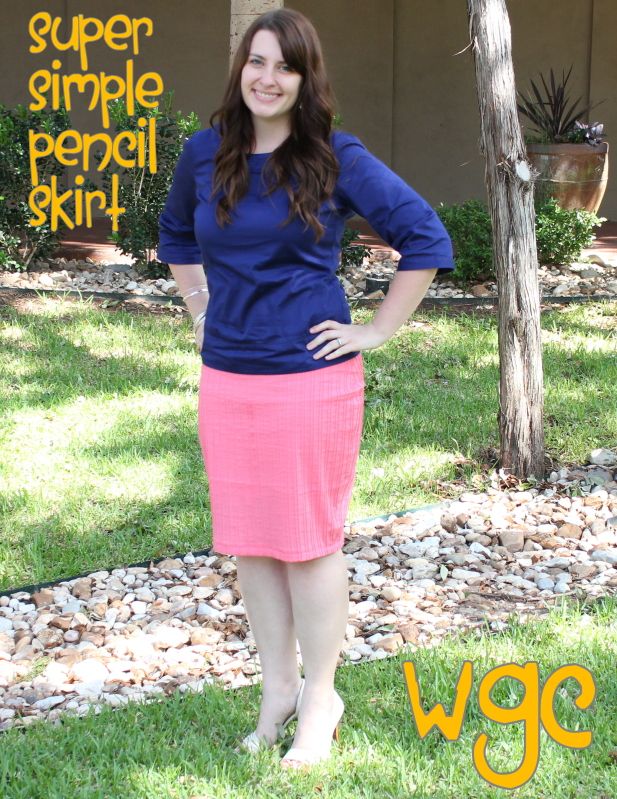
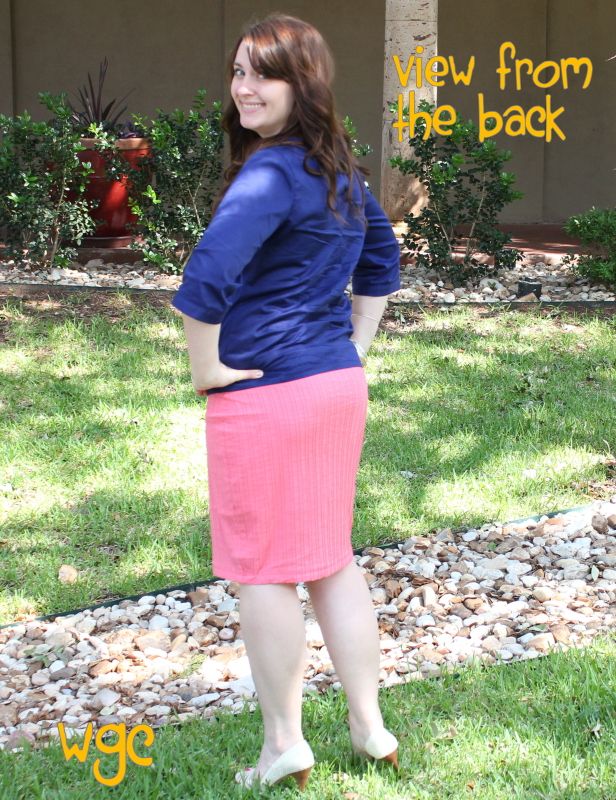
Then I wore it to church on Sunday:
What do you think?
My review of the tutorial: I got a little mixed up with the dividing the number in half but I figured it out. I didn't like that the tutorial didn't call for a hem on the top of the skirt. Next time, I will add another inch to the top of the skirt for a better waistband. Yes, there will be a next time because this skirt was so easy I want to make more!
UPDATE: I forgot to say this is a knit fabric with some elasticity and give to it, so that's why it doesn't need a waistband or elastic. I bought it at Jo Ann. Thanks for asking Rosie!
UPDATE: I forgot to say this is a knit fabric with some elasticity and give to it, so that's why it doesn't need a waistband or elastic. I bought it at Jo Ann. Thanks for asking Rosie!

Posted by
Just Jaime
at
6:00 AM
12 comments
:
 Labels:
Just Jaime
,
pencil skirt
,
sewing
,
simple
,
simple pencil skirt
,
simple skirt
,
skirt
,
tutorial
Subscribe to:
Posts
(
Atom
)

