Pages

Fourth of July Fun


These stars are a fun and easy decoration for kids to make.
You need fun foam scraps, foam core board scraps, paint and brushes, gluestick, and cardstock. If you want to skip the who stencil part, you could use striped and starry cardstock.
Trace at least 4 stars per each decoration you want to make. The stars need to have 1 line of symmetry. I used white and blue cardstock.
This will make 1 finished star.

Cut shapes from  the fun foam to make stencils. Glue the shapes to foam core board with the gluestick. The shapes don't have to be perfect. (In the words of Severus Snape.... "Oooobivously.")

Lightly paint poster or acrylic paint on the shapes. (The less paint the better. You can tell from some of my over-stamping.)
Now stamp away. I liked using various directions and color intensity. (That means you can stamp more than once without reloading if you want.) Don't try to stay in the lines. You will need 2 striped stars and 2 starry stars for each decoration.
Cut out your shapes after they are dry. Glue the 2 striped stars together and the 2 starry stars together so that you have the pattern on both the front and back. Trim as needed.

Cut a line up the center of of the striped star. Stop about 1 inch from the top. (Where the scissors end in this picture.) You might want to draw a dot to show a child how far to cut.

Cut down 1 inch from the top center on the starry star.

Now slip the striped star onto the starry star and Voila! Stars and Stripes in  3-D!


Crackle Nails

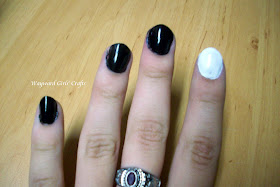
Crackle nails are fun and easy. You have to buy crackle nail polish. It can get pricey so look around for a good deal. First I painted my nails one solid color. I let my nails dry a little bit. I don't worry if they're not all the way dry.

Now apply the crackle polish generously. I don't like to do it thin but that's a personal preference.


Crackle dries very quick so move quickly when you're painting your nails. And just like that you have crackle nails.


Baby Doll Clothes

Remember how last week I showed you Preslee's first birthday party and enticed you by telling you I made her baby doll clothes?

I stayed up late most of the nights that week making her romper and all the other decorations as well as 5 outfits for some babies that I found for her at a consignment sale. There was a bag with two babies, two bottles, a hairbrush, toy rubber ducky, and about 10 diapers. I don't remember the price but I know I went on 75% off day so I probably didn't pay more than $2 for it all.
What I bought
I scoured the internet for tutorials and patterns for baby doll clothes. I found a cute blog that has free patterns and she had a whole project called the "Nakey Baby Project" to clothe a baby doll.
(Headband not pictured)

Here are the first two projects I did:
L: 3 & 4 (headband not pictured above) R: 6 & 7 
3: Is a little top that I had a hard time following the instructions so I just kind of figured it out as I went along. I made the top, adjusting for the small size of the doll although I didn't line it and it is really thin fabric- so I should have. Since the doll is so small I just put a small ruffle at the bottle of the bodice and called it good.

4: I just winged this one. I cut a strip of fabric about 5"x16" and hemmed one edge. I folded the top over to for casing for the elastic and  sewed the two ends together leaving the top open to insert the elastic. I inserted the elastic and sewed the top closed.

Headband: I measured the baby's head with the elastic and 1 1/2 the length to get the length for the fabric. I cut it about 2" wide which was a little too wide. I sewed the top and bottom together with wrong sides facing and turned it inside out. I inserted the elastic and sewed it all closed. I tied the ribbon in a bow and hand sewed it on.

6 & 7 Is a reversible dress with two pairs of matching pants- one for each side of the dress. One of the pairs of pants has elastic at the bottom which was really hard to put on since the area you're working with is so small.

L: 6 & 7 R: 1 & 2
6 & 7: I made the same pants only didn't put elastic in the bottom. The pictures shows the back. See instructions above.

1:  This is the peasant top she describes. She made hers with a knit fabric that didn't need to be hemmed which I didn't. I also had a really hard time with the elastic. I would attempt this again but my first try didn't turn out very well. WAYWARD!

2: I measured around the doll's waist with elastic, cut, and tied the elastic . I cut1/2"-1"wide by about 5"  pieces of tulle. I folded them in half, put the folded part around the backside of the elastic and pulled the ends through the loop around the elastic- See picture below. I continued until the elastic was all full.

To make this I measure a double over piece of fabric leaving 1" extra on each side of the doll's body for the width and from the doll's shoulders to knees plus 1.25". I hemmed the bottom and made a casing at the top for the ribbon. I sewed the sides together and cut the arm holes. I hand hemmed around the top of the casing and the arm holes. I inserted the ribbon and it was done. By far the easiest one! Want to make a top for you like this from an old T-shirt? See tutorial here!

Here PB is loving on her doll. Okay so I don't know if you call love throwing it on the ground but same thing!


Patriotically Playing with Wire

So who knew patriotically was a word? Not me! Anyways, I recently went to Tuesday Morning (aka the store that has a lot of stuff I don't need). I was looking around and saw some 18 gauge wire. I've been wanting to use wire in my beading and jewelry making and the price was right, $1.99! For the past two days I've been playing around with it and came up with a little patriotic craft.

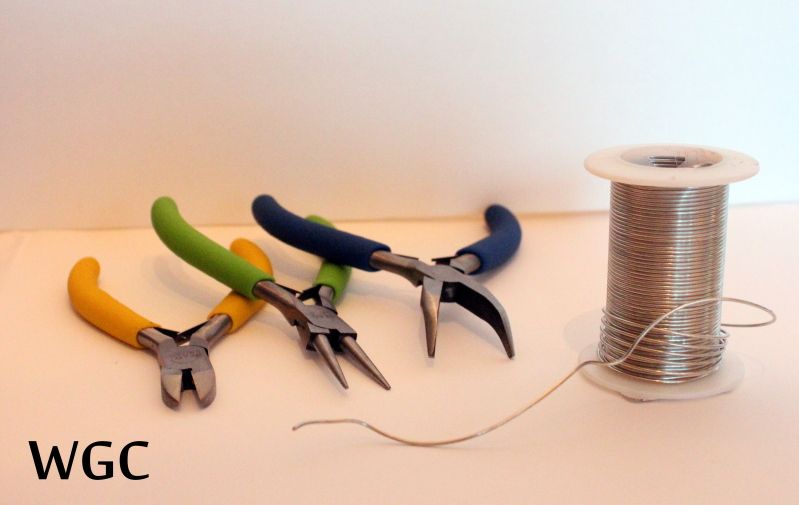
Supplies & Tools:

Photobucket

Wire cutters
Round Nose Pliers (very important!)
Bent Nose Pliers (less important but still good to have)
Wire (I used 18 gauge, very bendable!)

Directions:

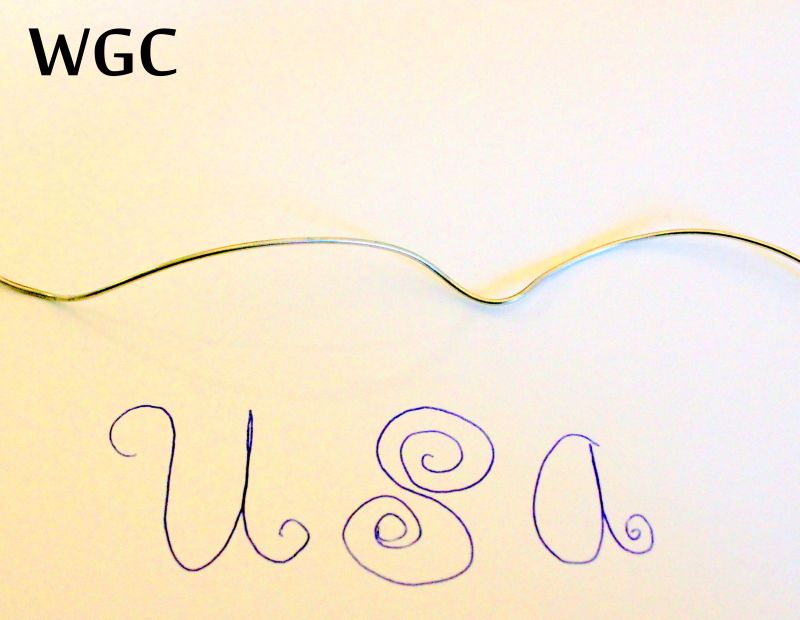
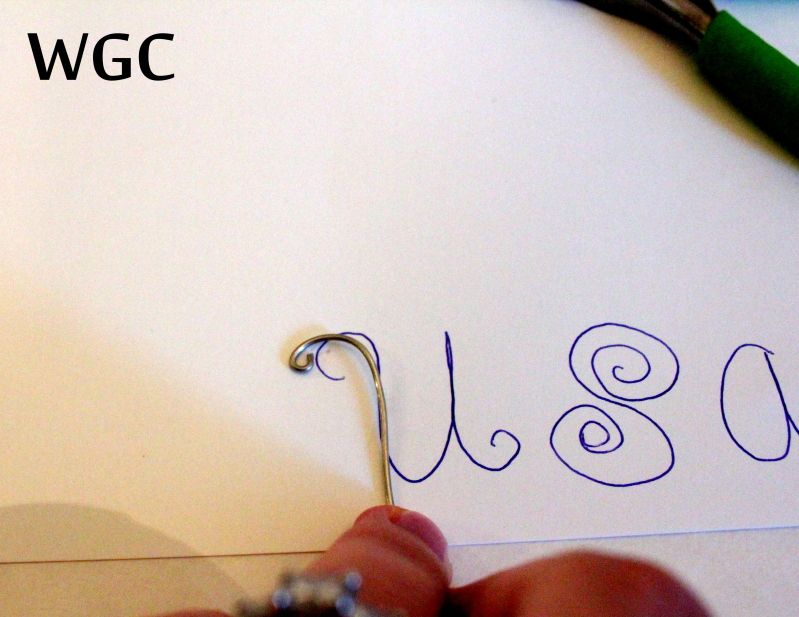
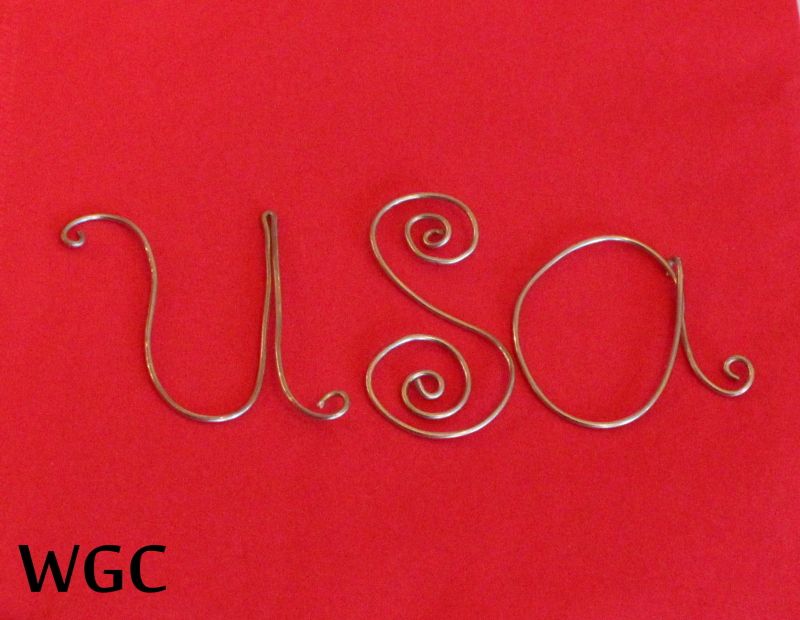
First figure out your design. I went with a swirly USA. For a reference, I wrote it out. Then cut a piece of wire for the first letter, and overestimate what you think you want to use.

Photobucket

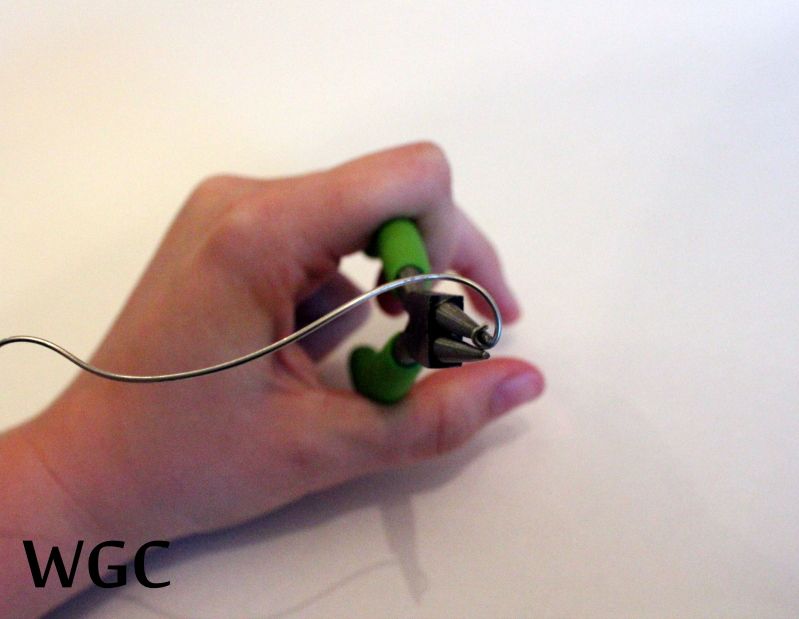
Next, start swirling! Hold the end of your wire with your Round Nose Pliers and twist the wire around. 

Photobucket

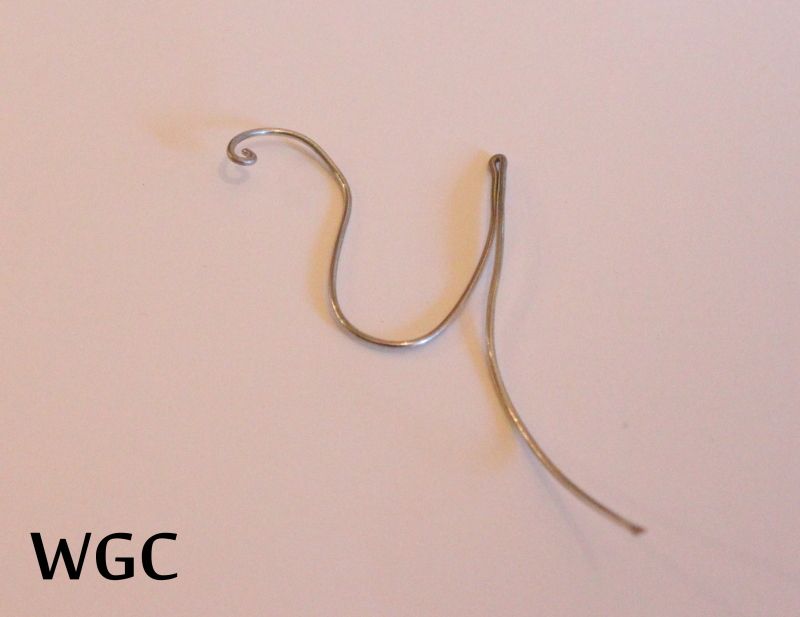
Using your pliers, hands or a combination of both, bend the wire into your shape. I like to use my sketch as a reference. 

Photobucket

When you come to the end of the letter, leave enough tail to swirl but not too much (eh, just guess!)

Photobucket
I trimmed this a little. 

Here is the finished product:

Photobucket

It only took me about 15 minutes from start to finish, and that included taking pictures! 

Ways to use wire letters:
On papercrafts
Glue to napkin ring
Hair barrettes, like this one
Glued onto sturdy key chain
Home decor, like with a faux firework display
Fridge Magnets
Jewelry**

**One thing to remember: the wire is still VERY bendable, so however you use these letters, make sure you know that little fingers can ruin your shapes. 

What would you design?

The Fastest Crib Sheet in the West

This guest post originally appeared as a guest post on Creative Cowgirl last summer.


Flannel crib sheets are one of my favorite baby gifts. Although they're perfect for cold winter nights, flannel crib sheets are hard to find in stores (at least for me!), and even then, your choices are always limited. So I like to make my own!

Materials:
  • 2 yards of 45-inch flannel (or any other fabric) (1 7/8 m of 1.1m wide fabric)
  • 48 inches of elastic [I use 3/8 inch] (1.2 m of 1 cm elastic)
  • Thread
Equipment:
  • Washer & dryer
  • Measuring tape
  • Rotary cutter
  • Iron
  • Sewing machine
It helps to know exactly how big the mattress is—if you're making one for yourself, this is easy. If this is for a gift, the standard crib mattress size is 52 inches long, 28 inches wide and 5 to 6 inches deep (132 cm x 71 cm x 13-15 cm), and that's what we'll use here.

Wash and dry your fabric. I know, I know, I promised you fast and this will take at least an hour. It may not be lightning quick, but sewing with fabric that might shrink later is the fastest way to ruin the project and waste your time! Trim off loose threads on the end if they're too tangled for the fabric to lay flat. Measure the exact width and length of your fabric. If it's longer than 71 inches (1.25m), or wider than 45 inches (1.15m), you'll want to either trim it down to that size or take that into account when you cut out the corners.

Now, fold the fabric into quarters, matching all the corners carefully. Using a rotary cutter, cut out an 8 inch (20cm) square of the corner where all the fabric edges meet.


Zig zag or serge the raw edges. They raw edges are less than 30 inches (75 cm) now. I actually did a 1/2 inch (1 cm) hem, folded twice, in the example and I made the square one inch deeper on the side perpendicular to the raw edge to compensate.


Sew the corners together. In each corner, pin right sides together. If they don't match perfectly, line up the outside corners/edges of the sheet. Sew the sides together, backstitching at both ends. Trim the excess if the fabric isn't even. Serge or zig zag stitch over the edge. Repeat on each corner.


Pin in the elastic. Cut four 12 inch (30 cm) pieces of elastic. Fold a piece of elastic in half and mark the middle. Pin that to a corner seam. Measure 12 inches (30 cm) from that corner down one edge, and pin the elastic there. Repeat on the other side of the elastic. I like to pin all the corners before sewing any of them.

Sew the elastic. With a wide stitch width and a short stitch length on a zig zag stitch, tack down one end of the elastic. Once you have enough of the elastic sewn down, make sure the needle is through the elastic and lift the foot.


Turn the fabric 90 degrees (so the corner seam is closer to you) and lower the foot again. Make the stitch length longer. Hold the elastic and the corner seam where you pinned tightly with your thumb and index finger, and pull the fabric taut, stretching the elastic out.


Sew the elastic to the fabric until you reach the seam, ending with the needle in the elastic. Stretch the other half of the elastic to match the fabric and sew until you're almost at the end of the elastic. End with the needle in the elastic. Lift the foot and turn the fabric 90 degrees. Lower the foot. Switch the stitch length back to short and tack down the other end of the elastic.

Voila! You're done!


Don't want to make your crib sheets quite so fast? Here are some more custom details you can use:
  • Hem the raw edges, or all the edges.
  • Enclosed or French seams on the corners: pin them wrong sides together and sew a scant seam allowance. Iron. Pin right sides together, and sew a wider seam allowance.
  • Full elastic: sew a tube or wide seam around the full length of the sheet, leaving the end open. Get a long piece of elastic narrower than the width of the tube. Stick a safety pin in the end of the elastic for better grip. Thread it through the entire perimeter, often redistributing the bunching. Tie the elastic ends together once you reach the end. Try it on the mattress if you can and adjust the gathers and pull the elastic so the sheet is snug. Sew the ends together and sew up the hole in the elastic casing.

What's your favorite fast baby gift?

WGC Independence Day Craft Roundup!

Last year on Wayward Girls' Crafts, we were very excited to celebrate Independence Day. Here are some of the Americana-themed crafts we shared in 2011!


Hope you found something to love in this
Wayward Weekend Roundup!


What will you make for Independence Day?

Original Sewing and Quilt Expo

On Thursday I had a real treat! I attended the first day of the first Original Sewing and Quilt Expo held in Raleigh, NC.

Since school got out, I have been spending almost every day cleaning, cleaning, and cleaning my house. I am doing all those things that I never do-- windows, baseboards, moving furniture to vacuum. (Oh, does everybody else do that every week? My bad!)
So.... I was really looking forward to taking a day off.

For some reason, I thought it would be a good idea to put the wrong street in the GPS (S Saunders and S Salisbury, what's the diff???), but fortunately I was only a few streets away. After parking my car and paying attention to where I did that, I made my way into the Raleigh Convention Center. The FFA convention was also being held there, and I was confused for a bit with all those future farmers, but it all turned out fine. The very first thing I did was run into a friend from church. We had our first class together! We learned 7 core sewing skills from Cynthia Guffey. (Stay stitching with the grain--- which changes a lot on any cut piece). She gave so much info that I wanted to buy her DVDs, but they were too much-- not just money, but more detail than I wanted. Anyway, it was a great class.

After that, I just looked at quilts. They were gorgeous, but since I follow rules, I didn't take any pictures.

Then, I found out I am a sucker for demos! I feel compelled to buy the product. First I bought this cool bonding powder.

Check it out, it is AWESOME!


Next I had another class on the Perfect Finish: Binding Basics with Janice Pope. Changed my (quilting) life. I can't wait to try it. I had to buy the ruler to go with it. While doing so, I had a nice chat with Janice.
I also bought this gorgeous fabric for $3  per 1/2 yard piece. (Suggestions on what to do with it?)
 This other ruler. (Again, sucked in by a demo. At least I didn't buy both rulers!)
And finally subscribe to 2 magazines and got this nifty tote and light
I picked up all these papers along the way and learned where lots of quilt shops are:
Though I was sure I was going to win the prize to be announced at 5:15, but 4:30 I was tuckered out and decided to leave. I had a hard time figuring out which exit to use to get back to S SALISBURY street, but after I finally did, I was able to find my car in the parking garage with no problem. (Believe me that is a BIG DEAL!!!)

If you are in the Triangle Area, you should try to go to the Sewing and Quilt Expo on Friday or Saturday. It's great!

Butterbeer

Photobucket

By now I hope you all realize that I am a fan of Harry Potter. Remember the totally awesome cauldron cakes? Or the finger puppets? Yeah, well here's a post to add to my love of Harry Potter. In the books the tween and teens frequently get a drink called butterbeer. My mom and I knew we had to make it for our Harry Potter Marathon. We searched the internet for a good recipe and came up with the one listed below. If you like hot white chocolate then I think you might like this drink. It is quite yummy!

Butterbeer
1 liter cream soda
2-3 tbsp butter
2-3 tbsp brown sugar
200ml single cream
4 or 5 Werther's Originals
  1. Put the cream soda in a pan to boil.
  2. Melt the butter and sugar together until the sugar has dissolved.
  3. Pour the butter and sugar mixture into the pan of boiling cream soda (make sure the soda is boiling, or the butter and sugar will solidify).
  4. Add the cream.
  5. Add the Werther's Originals and stir continuously until they melt.
  6. Serve hot! (we added some food coloring to get a more orange color like in the movies.)

PB's 1st Birthday Party: an ice cream party!

Here is PB's 1st birthday party. Can I just say first that I was really stressed the day of and things didn't go as smoothly as I had hoped but do you know why I threw the party? For the pictures. When PB looks back years from now she will know how much I loved her and wanted her to have a special day. We had an ice cream party. We also had hot dogs and chicken salad. We had it at a park since our house is currently on the market

I was running a little short on time so I just made one invitation, scanned it, and sent it out. The stickers are Martha Stewart and the bow tutorial can be found here

Recognize this? To get this up I had to throw the spool of ribbon over the rafter. I felt like I was TPing a house.

I painted these frames and glued the foam number ones inside. The centerpieces for the tables were balloons and candy jewelry. In each corner of the pavilion my tall dad taped up white table clothes and tied bows with tulle -under my close supervision ;) All together there were 9 tables with pink table clothes and I used 4 white ones- one for each corner.
Party favors. There was pink (white chocolate dyed) and milk chocolate popcorn.  Use quality chocolate and a bit of salt. To melt the chocolate I microwaved it for 30 seconds, stirred well, and put it in for another 15 seconds and that did the trick.  Decals were cut out with my Cherry Limeade Cricut font with miscellaneous number ones printed out for the center. 

Pink s'mores with kisses for the chocolate. If you look close you can see little bows on those skewers. Why yes I did stay up late (after 1 am...) the night before making tiny bows and hot gluing them to skewers.

Pink lemonade with lemon slices. Pink straws purchased from Michael's

The sweets table minus the ice cream which was in the cooler. There are butter mints and toppings for the ice cream. 

The A.M.A.Z.I.N.G. cake my mom made. Check out how to here.

The pillowcase romper I made her. Do you see her "1" button? She didn't take it off the whole time. It's a dollar store baby shower button I glued one of the favor decals on. I would share with you the tutorial about how to make the romper but guess what- it was far too wayward for me to pretend I did this the "right" way. You are far more likely to figure it out on your own! I would search for a romper tutorial and a pillowcase top one and combine them if you want to make a similar outfit. After all my searching I couldn't find one just like I wanted.

Look at that cutie!! Aren't those jellies just  the best?


Can I toot my own horn for a moment? So I about three months ago I featured this post. Soon after I went to a consignment sale in search of some dolls. It always go on the 75% off days because that's how cheap I am. I'm going to stop the story right there because I'm going to finish the rest next week. Just know I found a doll and I made her a matching outfit. Her little dress was just a pillowcase dress. 

Tune in next Wednesday to hear about PB's dolls!