This week I have been working on finishing up my own quilts for the Downy Quilt project Brooke wrote about on Wednesday. I was excited to try my Bias Binding Simplified ruler I bought at the quilt expo.
This ruler and tons of other ones are offered at Creative Grids. The website is very informative. They show all of their rulers along with videos of how to use them. The rulers have an anti-slip strip on the back to help in cutting. When I am ready to buy more rulers for quilting, I will be looking here!On the video for the Bias Binding, developer Janice Pope explains why bias binding is much more durable than straight grain binding. Check it out whether or not you buy the ruler.
The ruler shows how much fabric you will need to bind your quilt. It is much less than you might think. It also shows how to fold the fabric to get the most strips out of it.
To cut the strips, you just follow the folding directions. I had the video on my Kindle Fire and on my computer as I sewed.
Here are the folds.
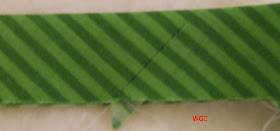
Once you cut the strips (I used the 2 1/4" width,) you see them together like this. You don't have to pin them, but I did so that I could match my stripes.
Press open the seams and then fold in half.
The video shows how to miter the corners and make the ends meet.
Here is what the binding looks like on the cowboy quilt:
I love how the stripes look!
Check out the website!


The stripes look fantastic!
ReplyDeleteGreat job. Binding isn't easy.
ReplyDeleteI can not wait to see the completed quilt! I love the little peek of the western fabric.
ReplyDeleteReally impressive! I had to really search to find the seam!
ReplyDeleteI love the stripes!
ReplyDeleteThis is something that really confuses me, so thanks for the post!
ReplyDeleteYour binding looks perfect.
ReplyDeleteI have been cheating on my wall hanging binding....I have been using heat adhesive, shhhhh.