Pages

2013 Costumes- The Royal Family

As I said last week we ( I ) decided to go as a current event. 

Can you tell who we are?
I'll give you a hint:

and


We took a little bit of artistic liberty with the Queen's outfit. It seriously would have been awesome if I had made a little business suit with a skirt like the queen usually wears but I couldn't justify making that. This dress would go in the dress up bin and skirt suit? No. PB wore that wig for exactly 5 minutes and I have carried it around two parties hoping she would put it on again. It is all for the pictures, right?


For the queen's costume I used a pattern to make the dress and got one yard of red ribbon and a large medallion. She had on a pair of pearls as well as the wig and a crown and we were set.


For my dress I used a pattern as well. It is light blue with polka dots which doesn't really show in the pictures.
Here are the patterns I used. In size 14 for the womens and 2T for the girls.
For Prince George we used a white blanket of course and our sweet new baby had on warm and fuzzy Halloween PJs on under.

For Prince William he just had all those clothes in his closet. Lucky!

As my niece was taking pictures for us we decided that this background was too busy but I just couldn't resist posting this one because of PBs face. Priceless!!

This isn't the first time we dressed our baby girls up as a boy/man for Halloween. It's a good thing they're little :)

Kate Middleton is seriously my style icon. Did you see what she wore to George's christening? and how skinny she already is? Seriously gorgeous! Don't you wish you could pull that hat off?

Did you see the post from last week about all of our past costumes? Do you have a fav?
What did you or your kids dress up as, for Halloween?

7 Steps to Get Your Kids to do Chores

Our chore system works great--sometimes. I dole out the assignments, help the kids, and we have a clean, well functioning house. Sometimes, I have to remind and push and nag all day, and finally my husband gets them through their chores just in time for bed. There is no perfect system, but as a mom of four kids, ages 7 and under, I can tell you that this works. And my friends with older kids assure me that this struggle to lay a good foundation young is worth it.
Let me repeat that: this is worth it!


A Good Beginning


If you haven't already begun doing chores, it's important to explain your expectations. Doing chores is not the parents taking a promotion; it's having the kids contribute to a happy household. We all have to do work around the house. Sit the children down and explain this. If you're using a chore chart, unveil it and explain it here. If you're withholding privileges and/or offering rewards (more about both later), explain those systems here, too.

As we mentioned last time, clear expectations are key here as well. Young children (and even older children! Heck, even adults!) need to know exactly what's expected of them. You won't get results from taking a three-year-old to the door of a dirty bathroom and command them, "Make it clean." Show them step by step and help them with . . .


Understanding (& Patience)


I still remember what it was like to be a kid, and to look at a room filled with toys, and not know where to begin. Or a room that had all the big things picked up and think I was done, only to be instructed by my parents that I was nowhere near done.

Young children should not be expected to clean a room systematically or completely without explicit instructions, and often help and reminders. Cleaning isn't instinctual ;) . We're not just assigning them chores; we're teaching them how to maintain a household. A three-year-old is capable of scrubbing a toilet--but she may need it explained and demonstrated a couple (dozen) times.

Appeal to the Rules


Our household is run heavily by the rule of law: once we make a law (a rule), it rules (not our tyrannical wills, most of the time . . . whoops, my degree is showing). "I'm sorry, that's the rule," makes it sound like it's totally out of your hands--and any further appeals to you will be fruitless.

I'm pretty sure this is why rules were invented.

Withhold Privileges


I know, how cruel to make your children work for the privileges of playing computer games, seeing their friends, watching TV, etc. We're probably the meanest parents in the history of the world for doing things like this.

Reward Compliance


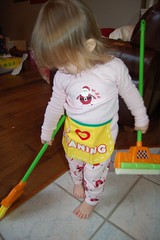
"I heart Cleaning"I once heard a talk by a family counselor, and he said to immediately thank a child as soon as they begin to obey. But you can do more than thank your kids, too: when our kids do their chores, with the Family Do Dots system they earn scrip to use in a family "store" once a week. You might pay your kids an allowance. When we Wayward Girls were little, we got to pick out a piece of candy if we did our chores. Young children can be motivated by the smallest rewards.

Choice & Accountability


Make chore time about their choices. They can choose to do their chores and as a consequence, receive privileges and rewards, or they can choose not to do their chores. Even adults don't get to choose the consequences of our actions!

Also under this, make sure the chores are completed and track this. Kids can tell if you're not really checking. (Spot checks can also be very effective.)

Teach Them to ENJOY the Results


Especially following a large task, like cleaning and organizing the toy room, have your children look around at what they've accomplished. They've cleaned this entire room. Help them not only understand the sense of accomplishment they should have, but also help them appreciate how nice the room looks, how easy it will be to find their toys, how much more fun they can have now that the room is clean. This end result is what we want, and if they can internalize that desire for themselves, it's helping them learn to work independently.

Posts in this series: 7 things every parent should know about kids' chores

Photo credit: two children cleaning—Michael Bentley; child cleaning—Amanda Westmont, via Flickr & Creative Commons

Our Past Halloween Costumes

I have to admit I look forward to dressing up for the church trunk r' treat well in advance each year. I've had our costumes for this year picked out for at least a couple months. Stay tuned for those next week!

In the past we have had some great costumes. Do you remember these?


Jessie, Andy, Woody, and Buzz


Flintstones: Wilma, Fred, and Pebbles


Goodness! Seeing my hair orange in those last pictures makes me remember the 5 washing (scrubbings) it took to get all the orange out! Are you guys excited to see this year's costumes? We have two new little ones to add to the mix. This year our family is going as a current event.

What are you going as? Jordan put together an awesome list on her personal blog of costume ideas. Check it out here.

Fall Initial for the Front Door

Recently I was Skyping one of my best friends and she was showing me her new house. As she walked in her front door I saw we both had A's on our front door (we happen to share the same last name). So basically what I'm trying to say is all the cool kids are doing it. Her A was painted turquoise and on a super cute burlap wreath.

Here is how I made mine:

I used 2MM Jute cording, a 12" A I got on sale for a great price, and two 2 stems of fall flowers.


 Tips for wrapping:
1: I started out by gluing the jute close to the bottom with hot glue
2: I wrapped it around one time and then I put glue (this is hard to see in the picture) on the bottom edge so you can't see any white. If I could do this again I probably would have painted the letter before hand.
3: I continued to wrap and put glue along the edge as I went.
4: I wrapped up the bottom of the A, cut and glued down the jute, and wrapped the jute around the cross of the A.
 For the flowers I wanted to be able to change them out so I glued them close together on a piece of stiff dark stiff felt. I glued the leaves onto the side.
 I glued a piece of jute on the back of the felt and tied it into the A. 


Isn't it cute?!

After I put up my fall decor I added the A to my wreath but I can change it out at any time. I think when it hangs alone I need to add a beefier bow at the top.

Have you tried adding jute to anything this fall?

Fall Decor

For the past three year I have shared with you guys my fall mantle (both can be seen here) and I feel like each year it gets better. This year I decided to add a bit more of that lovely fall feel to my autumn decorations with some burlap.

I've had this burlap for quite some time. They sell burlap in many different shades. I'm not sure what you're supposed to do with burlap but it's very stinky so when I got it home I washed it delicately in a bucket with some soap and then rinsed it. A good amount of dye came out (but I don't feel like it changed the color of the fabric) and so did the majority of the smell.


I added the burlap in two places. I used some vases and cut pieces about 4" wide x the circumference. I glued them on the back and wrapped some twine around about 10 times. I made a bow and glued it onto the side.


I also added the burlap as a table runner on both surfaces. I love the texture and richness the burlap adds.

How are you decorating for fall? 

7 Things Every Parent Should Know About Kids' Chores

Maybe you're one of the lucky ones, but for us, chores have always been . . . difficult. Between finding a system that works for our family to finding the motivation to actually do it, sometimes having my kids do chores is harder than just cleaning the house myself!

But really, I'm not here to take care of everything for them: as a mom, one of my jobs is to teach my children how to become independent adults one day. And as part of that, I've learned that I need to teach them to do their chores.
 
Photo by Virginie Moerenhout

Let me say that again, because that's the #1 principle that every parent should know:

1. Children must be taught to do chores.
Nobody is born knowing how to pick up a room, put laundry in the proper drawers, do the dishes, etc. We must learn. It helps if we start teaching them while they're young. I imagine that many adults learned to do chores at such a young age that they hardly remember the learning period, but kids don't have that luxury.

2. Children (like everyone else!) need clear expectations for chores.
Most children under the age of about eight can't just be set in a messy room and commanded to clean it. They need specific instructions on what to pick up (i.e., categories of things: toys, books, clothes), where those categories of things should go (i.e., toy box, bookshelf, hamper), and what constitutes being "done." I remember myself being "done" with cleaning only to discover that my parents expected a lot more--and I see the same thing from my kids. It's frustrating for everyone.

3. Recognize the difference between "picking up" and "cleaning."
There's a big difference between picking up things and actually cleaning the house. If you only have small children, they will probably not be cleaning: vacuuming, scrubbing toilets, mopping floors. They should, however, begin picking up very young: putting away toys, books, clothes and other things on the floor. Picking up usually makes a bigger difference faster. Cleaning is a more advanced skill that, again, must be taught.

4. Systems. Work.
While not every system will work for every family or every child, the basic principle holds true: a chore system works. It helps to make the expectations and responsibilities clear, and the best systems also help track progress and completion--and even reward them! We've been using Family DoDots since January and for the most part, it's been very effective at keeping our family on track through the birth of a new baby and a move, two things that can derail any system.

5. Accept some mess.
This might sound contradictory in an article on doing chores, but I do believe that it's okay to have some mess in your home. Everyone's comfort level is different, but it's important to remember that they're kids. I also try to keep in mind that some days there's more mess than there are hands to pick it up, so I do triage: I pick the three messiest areas and assign them to my three chore-aged kids (plus a fourth area they work together on, and their bedrooms), and let the rest wait until another day. (Or, I guess, I pick it up myself if it's really bugging me.)

6. Work on your kids' level.
A teenager, unlike a preschooler, should usually be able to pick up and clean a room pretty independently. We start encouraging our kids to pick up around age one or so. By the time they're about two, we start our kids on actual chores--but we keep these age appropriate. Also, as we make assignments, we try to tailor them to each child. My seven-year-old's dresser drawers are labeled with words. My three- and five-year-olds' drawers are labeled with pictures.

7. Work with your kids.
This might actually be the #1 thing to do. It's certainly the #1 thing for me: nothing else helps to keep my children on task, happy and helping more than having me there with them, guiding, interacting and most of all modeling what to do. I do not do their chores for them, but when I work with them, we all get through the process faster and happier.

What other ideas & attitudes help you with your kids' chores?

Coming up in the Kids' Chores series: more on ways to make your expectations clear, tailoring your chores to your kids' ages, and how to get them to DO them!

The problem with penuche

I have a problem with penuche, aside from its fairly ridiculous pronunciation (puhn-OO-chee).


You wouldn't think I'd have a problem with the stuff. My favorite type of candies are See's Bordeaux (milk chocolate, please), with have a brown sugar buttercream filling. You'd think brown sugar fudge would be pretty much perfection for me. Jump to recipe.


I mean, it's made with ingredients that I have on hand all the time: milk (or cream), white sugar, brown sugar, butter, vanilla.


You get to play chef with your candy thermometer that broke in the move instant read meat thermometer. Just look at the bubbling goodness!

And then just when it gets sticky (well, to the soft ball stage, 236 - 240 F), you pull it from the heat, throw in butter and vanilla and walk away.

When you get back, you beat it within an inch of its life.

Uh . . .yeah. Once it gets to this amazing phase, side note: that's a bad time to stop stirring and pick up the camera. It's done, but it's solidifying by the second.

No matter, as long as it's warm, you can still press it into the buttered pan:


Oh, did I say there was a problem with penuche? Oh yeah.
 So my problem with penuche is that I ate the whole thing.

Recipe
adapted from Better Homes and Gardens New Cook Book, 12th Ed.
Ingredients
  • 1 c granulated sugar
  • 1 c packed brown sugar
  • 2/3 c low fat milk (you can also use cream or half-and-half)
  • 2 Tbsp butter
  • 1 tsp vanilla (I used um . . . 1 "spill" vanilla. Whoops! Wayward!)
  • 1/2 c chopped pecans, walnuts or cashews (optional)
 1. Line a loaf pan with foil by shaping the foil on the outside of the pan first, then molding it to the interior. Butter the foil.

2. Butter the sides of a 2 quart saucepan. In the saucepan, add the sugars and milk. Cook and stir over medium heat until the mixture boils. Grab your instant read thermometer. Reduce heat, continuing to boil steadily but not hard, stirring frequently, until you reach the soft ball stage (236 - 240 F). You may have to adjust the heat to maintain the boil.

3. Remove from heat but leave the thermometer in. Add butter and vanilla. DO NOT STIR. Let sit until thermometer registers about 115. (Original recipe says 110, but this seemed to be just a little late to come back to the party, IMO.)

4. Remove thermometer. Beat mixture within an inch of its life, first to mix in the melted butter, then to incorporate air. (If using nuts, add them when the mixture begins to thicken.) When the mixture is lighter and loses its gloss, it's ready (original recipe says this takes about 10 minutes; seemed like less for me).

5. Spread penuche into prepared pan. Score. When firm and cooled, lift out of pan using the foil and cut into squares. Store tightly covered for up to 1 week . . . or, like me, eat it within a couple hours.

Makes 32 1"x1" squares.