Music Advent Calendar Garland

This year I wanted to make an advent calendar, but I wasn't sure what I wanted to do for each day. I wanted something simple enough I could really do it everyday. So I decided on music. I love Christmas music and my favorite part of Christmas Eve at my parents' house is singing all the Christmas carols. This was a great way to celebrate and appreciate the music all month long.

 photo 3319932B-0C6D-4D9A-AC7B-2247ECE72A2B_zpszlweutvu.jpg
Ignore the football game on TV in the background

I thought it'd be fun to put the countdown on my mini Christmas tree as a garland. First, I found some vintage Christmas sheet music and printed it onto cardstock. Using my Silhouette, I cut out circles from the cardstock with the numbers counting down to Christmas and small holes at the top of each circle, to attach them to the garland. I also cut red circles.

 photo 46933383-ECC1-4707-AF63-25D3BD179A04_zpsbpacu1hy.jpg 

I wrote two song titles on the red circles, one a Christmas hymn and the other a fun Christmas song. Finally, I glued the red circles on the back of the printed cardstock circles and tied them onto twine to make the garland.

 photo 89F3E6BE-1E09-4A86-905F-81FFAC06A409_zpswprzstxb.jpg

Here's the list of songs I used:

Christmas Hymns


Spiritual Children's Christmas Songs
From the Church of Jesus Christ of Latter-day Saints' (aka Mormon) Children's Songbook:


Fun Christmas Songs:

Deck the Halls
God Rest Ye Merry Gentlemen
O Christmas Tree
O Come, O Come Emmanuel
The Twelve Days of Christmas
We Three Kings of Orient Are
We Wish You a Merry Christmas
What Child is This?
The Holly and the Ivy
Santa Claus is Coming to Town
White Christmas
Let it Snow
Jingle Bells
Jingle Bell Rock
Rudolph The Red-nosed Reindeer
It’s the Most Wonderful Time of the Year
Rockin’ Around the Christmas Tree
Feliz Navidad
Frosty the Snowman
A Holly Jolly Christmas
Here comes Santa Claus
Carol of the Bells
Home or the Holidays
It’s Beginning to Look a Lot Like Christmas
Winter Wonderland
The Christmas Song

Now each day we can sing those songs and, if I'm feeling ambitous, I can research about these songs or read coordinating scripture references (found in the LDS hymnal at the bottom of the page, helpful!).

Merry Christmas

What to do with leftovers??

Some people's favorite part of Thanksgiving is the leftovers! I can't help it--I love to try new things. I'm going for a turkey banh mi this year. Here are some more great ideas on what to do with your turkey:


Turkey Banh Mi


Turkey Stroganoff


Turkey Empanadas


Peanutty Turkey Salad Wraps


White Turkey Chili

Two Little Skirts From Mom's Bleached Pants


So as I mentioned here I got an awesome deal a while back at Old Navy on some corduroy, stretchy, skinny jeans. So I went back and got two more pairs. One of the pairs I was wearing while doing laundry soon after and spilled bleach down the leg :( sad day.

So I took those cute skinny jeans and made them into two cute skirts for my girls. One I made in 2T size and the other is Newborn. I used waist approximations from skirts they had.

I first cut the largest sections I could from the pants. One of the parts had some bleach on it but I sewed that section out of the skirt. I made the skirts around 1.5 the circumference of their waist. The corduroy didn't gather well so I'm glad I didn't do it any more.

I evened out the pieces and sewed the pieces together. 

I hemmed the bottom with only one roll up because the material was not fraying. I folded the top over and hemmed it as well. I stretched the elastic as I sewed to create the gather and I put them on my little models.

 I realized whilst trying to take pictures of a newborn and 2 year old in matching outfits, it is almost impossible. This pictures was how all of them were turning out.
Obviously there's underwear showing, both girls are moving, goofy smile and crying, my ironing board in the background, one has no shoes and there other has on just one. 
Merry Thanksgiving Eve! Enjoy your Turkey and day of gratitude! 

13 Fun Ways for Kids to Show Gratitude!

Thanksgiving is here at last!

I'm definitely looking for ways to help my kids to learn and show gratitude this week, and here are 13 fun ideas I found!

1. Topical gratitude challenge

You can use these categories to go around the Thanksgiving table, too.

2. Gratitude garland

Great for decorating for Thanksgiving, too!

3. Family gratitude journal

Also a fun family activity.

4. Gratitude poster

Beautiful, creative and grateful.

5. Gratitude tree

Another fun way to decorate for Thanksgiving and fall.

6. Gratitude cards

Rainbow colored cards that include prompts, ideas and tasks.

7. Gratitude banner

So many ways to use this one! Here, they've got pockets for each family member and other family members can leave notes telling why they're grateful for them.

8. Gratitude rolls

Fast, easy and fun to share at Thanksgiving dinner!

9. Gratitude at the Thanksgiving table

Prompts and papers for Thanksgiving dinner gratitude. Fun alternative to simply making rounds of the table.

10. Gratitude pinboard (literally!)

A real-life pin board to fill with things you're grateful for.

11. Gratitude alphabet

What you're thankful for, from A to Z

12. Donate food (or clothes/time/service) to those in need

I like to help my children weed out toys they don't play with anymore and donate them at Christmas time, and we'll definitely be donating food this year. (Side note: check with your food bank first. Donating food is a great gesture to involve your children, but sometimes food banks get a better deal than we do, so giving them the same amount of money can go a lot further, and you can find other ways to involve your children.)

13. Collect thank you notes and treats for our troops

You can make care packages for anyone who might need a little extra love during this season: elderly neighbors, far-off family members, our troops.

How do you help your kids remember to be grateful?

Adding Privacy to Front Door Sidelights

Note: Please forgive the horrible pictures in this post it is really hard to take a picture of windows. 

Our front door has sidelights on the two sides and across the top. This adds a lot of light but also leaves a lot of windows for little neighborhood children eyes to peek in. Can you see them now with their hands cupped around the sides of their eyes peeking in the windows?
Ahhh! I spelled SiDelights wrong! Sorry you'll have to forgive me!
I saw this pin and thought it was a great solution. She gets her tutorial from this post. (original tutorial)
Both posts are great! Here are some additional tips that I found while I was doing this tutorial:
  • After cutting out the shapes they will curl up. I put mine inside of a big book to help flatten them.
  • Use small scissors.
  • These shapes are a tessellation. They will fit together as you cut. The pattern found in the original tutorial is not quite perfect. To get your shapes to fit together a little better, before you start, make sure the top and bottom are the same. I wish I had done this.
  • It's not going to be perfect. If you look close at any of the pictures you can tell the area in between is not uniform. You and I are the only ones that will look that close.
  • When peeling the backing off the paper bend the shape curved with the paper on the inside of the curve (see picture) to help from creasing the contact paper while peeling. 
  • Enlist some help because seriously cutting 76 of these bad boys was time consuming! 
  • I cut a strip of paper 1/2" wide to help with spacing after a while I just eyeballed it. 


I kept mine the original size of the pattern unlike one of the tutorials. 

What do you think? 

Laced Front Big Sister Tshirt

Who can resist a cute Big Sister/Brother tshirt? Well I wanted to make my own. I have made shirts for PB in the past for her 2nd birthday and last year's Halloween costume. This time I altered the neckline as well as painted the front.

I first used gold paint to write Big Sister on the front. Similar to how I did the Blue's Clues shirt in the birthday shirt post above.

For the neckline of the shirt I folded the ribbed edge of the shirt under and sewed all the way around with a zig zag stitch. I trimmed off the ribbing. I then cut 9 approximately 1 inch slits around the edge of the front of the neck line. Make sure you do an odd number.

I then cut 9 little pieces of fabric about 1.5" x 1". Each piece I laid on top of the slit (on the front of the shirt) then sewed around the slit.


Snip a hole through the center making sure the whole length is cut.

Take all of the fabric and flip it through the whole and sew around the edge.

Repeat around the edge of the neckline. Snip off any extra fabric. This leave a ton of strings. Here is my completed set of 9 holes. They aren't perfect. These are really hard to do because they are so tiny but them make the shirt look very finished. 
Here's the finished slits. There were so many  threads!
Last I sewed the ribbon onto the seams for the shoulders and laced them through the holes. The ends of the ribbons come up through the same hole to tie.

Here is the finished result. What do you think?
She's making a goofy face but she is one proud big sis!


Chocolate Chip Pumpkin Cheesecake Dip

Do we really need an introduction with a headline like that?

As usual, I had an idea, I went hunting for recipes, and I didn't find anything I liked. So I took some inspiration and did my own thing. (Wayward!)

Chocolate chip pumpkin cheesecake dip
1/2 c pumpkin puree
1 (8oz) tub of light cream cheese
1 c powdered sugar
1/4 tsp pumpkin pie spice
Optional: 8 oz whipped topping (the dip is a little on the runny side; this gives it more body)
1/3 c, give or take, semi-sweet chocolate chips (mini chocolate chips would be fantastic)

Using a mixer or a stand mixer, combine puree, cream cheese, powdered sugar, and spice until smooth. Fold in (optional) whipped topping and chocolate chips. Serve with vanilla wafers, graham crackers or spoons ;) !

How do you like your pumpkin?

Cable project revealed!

If you watched Monday's video on knitting cables without a cable needle, you already know the secret of what project I was working on.


I needed a fast gift for my son's teacher. She's been really great for him, and she's helped me a lot with a personal project, so I wanted to do something for her. My son said her favorite colors were yellow and green, and I'd seen a picture of her wearing a cabled headband a few years ago. I know she doesn't like hats, so I thought a yellow cabled headband would be a great, fast gift to make for her. (Plus I have a ton of yellow Aran weight yarn.)


If you haven't used Ravelry and its pattern search--you've gotta. I searched for headbands with cables with free patterns online, and I came up with the Evenstar Headband by Jaime Louise, designed to match the Evenstar Gloves by Audrey M. (Here's my project on Ravelry.)


It's a really cool cable pattern--but be sure to follow the pattern! I thought I knew what I was doing the first repetition through, but I messed up about 10 rows and had to frog them. However, even with that set back, it knitted up in one day, blocked the next. Finally got a button yesterday, sewed it on today and sent it off!


My camera was a big smudgy, but the most interesting and unique part of the pattern is the "uncable," where the two cables come close in the middle, and then you actually just wrap the yarn around all those stitches, bundling them together. I've never done that before, and the result works really well in this pattern!

How do you pick thoughtful gifts?

Two-Tone Top

I made this shirt while pregnant but the basics can be applied to any shirt. I had a pink and melon colored shirts that had an odd neckline and the pink didn't look good against my skin. I tried taking a picture before and it was just so bad I'll leave it up to your imagination.

First I cut the shirts under the bottom edge of the sleeves. I tossed aside the green bottom and pink top.

I cut a more flattering neckline on the green top. I used the melon-colored bottom and traced where the neckline would be. Going about a half inch bigger I cut out the shape of the neckline. I cut about an inch wide section in the shape of the neckline. (see picture)

I sewed the extra piece onto the neckline and then flipped the fabric to the backside and sewed along the edge with a 1/4 inch seam allowance.


I sewed the pink onto the melon-colored piece and I was done!


Do you have any shirts you want to make better?

Knitting without needles (well, one . . . )

There are actually ways to knit without any needles, but today we're talking about getting rid of an extra needle: the cable needle. When your cables are fairly small, you don't need the cable needle all the time. I made a cute craft yesterday (sharing the finished object Friday!) that featured fairly small cables: 3 and 4 stitches wide. It's the perfect candidate for cable needle-free knitting!

This is an intermediate-advanced technique. A basic understanding of knitting and cables helps a lot ;) .


The basic idea is that you move the yarn in front of the stitches you'd normally slip onto the cable needle (for a back cable; behind for a front cable). Instead of slipping them onto a cable needle, you just put them on your right-hand needle. Then you knit the other stitch(es) in your cable. With a bit of tricky finger work, you pick up the slipped stitches with your left needle, then take them off your right needle, twisting the stitches into the right place.

Sounds complex, doesn't it? You should probably just watch the video. ;) It's amazingly easy to do—and pretty darn hard to figure out from a written explanation!

Shaving Cream and Glue Finger Paint

This paint is so fun! It's puffy and easy to clean up!

What you need:
Shaving cream
White glue
Food color

Mix together about equal amounts of shaving cream and glue. Mix in the food coloring.

I gave PB a big sheet of news print and two little bowls of the mix and let her go to town! She loved it! I didn't care where she got it because she got a quick bath afterward.


Those funny faces crack me up! 
Have you done anything fun with your kids lately?

Ooey Gooey Butter Cake Bars

For the last couple Novembers, my husband's work does an Iron Man challenge, where employees have six weeks to complete the requirements of an Iron Man triathlon. This is a great time to exercise, eat healthy and lose weight. For him.

Naturally, on November 1, I wake up totally ready to support him by eating all the Halloween candy . . . and baking lots of new treats.

Let me tell you straight up: don't bother hunting for "butter" flavored cake. This doesn't exist. They have other flavors of cake made with butter. After much research, it seemed that French Vanilla was the right flavor of cake. Especially since I had a mix sitting in my pantry.

Paula Deen, Butter Queen, will tell you to use a whole stick of butter in the filling and the crust. I didn't think this was necessary. The first recipe I started with called for an 8x8 pan. The result was really thick--thick enough that a 9x13 makes much more sense. (The recipe also called for "1 butter," so, uh . . . yeah.)

Ooey Gooey Butter Cake Bars
(Wayward Method--combining 3 different recipes)

Crust layer:
1 French Vanilla cake mix
1 stick of butter, melted
1 egg


Filling layer:
8 oz cream cheese
2 eggs
1 tsp vanilla
1 lb powdered sugar (~3 3/4 c) (or eyeball half a 2 lb bag....)


Preheat oven to 350. Line 9x13 baking dish with parchment paper. Mix the melted butter, cake mix and egg to form a dough. Press into prepared baking dish.

Beat the cream cheese. Add eggs, vanilla and powdered sugar. Pour over cake layer in pan.

Bake for 45 minutes or until set. The top layer will look crispy crackly, a bit like a brownie's (though it's thicker in practice).

Allow to cool before cutting. (If you don't, the ooey gooey part really will come true, with the filling flowing into the pan. Still tasty ;)

Results?
Aside from the crazy recipe confusion as I was making this, it was super easy and quick to make. Baking seemed to take a long time, probably a function of how thick the recipe made it.

Once it was done and we let it cool just a little, we couldn't resist any longer. This. Was. Amazing. The flavor hit vanilla, butter, and cheesecake notes, with plenty of caramel undertones. Sweet, chewy, with a crackly top layer like a thin meringue. It reminded me a lot of everything I liked about chess or buttermilk pie.

I can't wait to make this again! My husband, on the other hand . . . he'd like me to defer until December.


Variations I've got to try:
  • Fruit pie filling (apple, blueberry) between the crust and filling layers
  • Thanksgiving-y: add pumpkin pie filling to the cheesecake layer
  • Chocolate chips. 'Nuff said.

Have you tried ooey gooey butter cake bars? Is fall baking time for you?

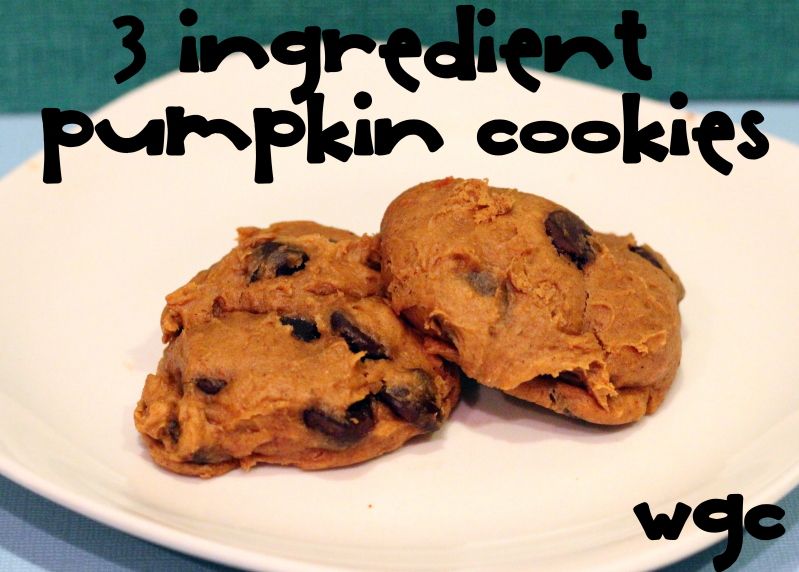
Pumpkin recipe roundup!

Last night after we finished trick-or-treating, my 5-year-old looked up at me and asked, "What's fun in the next year [month]?"

What's NOT fun? Fall is in full swing, the leaves are falling all around, and pumpkin recipes are helping us all get ready for Thanksgiving!


What are your favorite pumpkin recipes? 
Share links!
Related Posts Plugin for WordPress, Blogger...