Our front door has sidelights on the two sides and across the top. This adds a lot of light but also leaves a lot of windows for little neighborhood children eyes to peek in. Can you see them now with their hands cupped around the sides of their eyes peeking in the windows?
 |
| Ahhh! I spelled SiDelights wrong! Sorry you'll have to forgive me! |
I saw this pin and thought it was a great solution. She gets her tutorial from this post. (original tutorial)
Both posts are great! Here are some additional tips that I found while I was doing this tutorial:
- After cutting out the shapes they will curl up. I put mine inside of a big book to help flatten them.
- Use small scissors.
- These shapes are a tessellation. They will fit together as you cut. The pattern found in the original tutorial is not quite perfect. To get your shapes to fit together a little better, before you start, make sure the top and bottom are the same. I wish I had done this.
- It's not going to be perfect. If you look close at any of the pictures you can tell the area in between is not uniform. You and I are the only ones that will look that close.
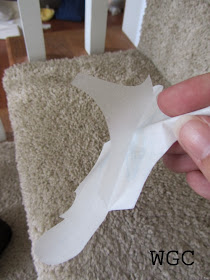
- When peeling the backing off the paper bend the shape curved with the paper on the inside of the curve (see picture) to help from creasing the contact paper while peeling.
- Enlist some help because seriously cutting 76 of these bad boys was time consuming!
- I cut a strip of paper 1/2" wide to help with spacing after a while I just eyeballed it.

 |
| I kept mine the original size of the pattern unlike one of the tutorials. |
What do you think?


Love it!
ReplyDeleteThank you for the inspiration! I did this on my sidelight windows, and it turned out to be beautiful. We were so tired of curtains getting caught in the door. I'm so glad I found your blog post, and decided to try this project. It was very time-consuming, but totally worth it.
ReplyDelete