Pages

Dollar Store Craft: custom geometric vases

A few months ago, I found some great glass vases at the Dollar Store. I filled them with free seasonal decor. When we moved, I had to find a new place for my vases, and the best place was in the living room. But I needed five more vases.

Rather than filling them all again, I decided I wanted to paint them to match our new living room decor. I picked up some acrylic paint and masking tape ($2 and $1, respectively) and sat down to make some awesome designs with the tape. 

I turned this into a kids' craft, too, because I laid out the newspaper and let my kids loose with the foam brushes!


Some tips on getting this right:
  • Use (at least) two coats of paint, and allow the paint to dry fully between coats.
  • Apply the second coat carefully and quickly, and lay it on thick. Try not to paint an area more than once. If you don't, the paint will ripple and pull off!
  • You can use the acrylic enamel made for glass--it'll be dishwasher safe and it might work better, but I don't know how well it works with masking tape.
  • Be careful when pulling off the tape! The acrylic doesn't want to adhere, especially at the point of diamonds or triangles. If I did it over again, I wouldn't do those shapes. A razor blade can be helpful in holding down the paint while you pull off the tape. (Or you can do what I did and use your fingernails. Wayward!).


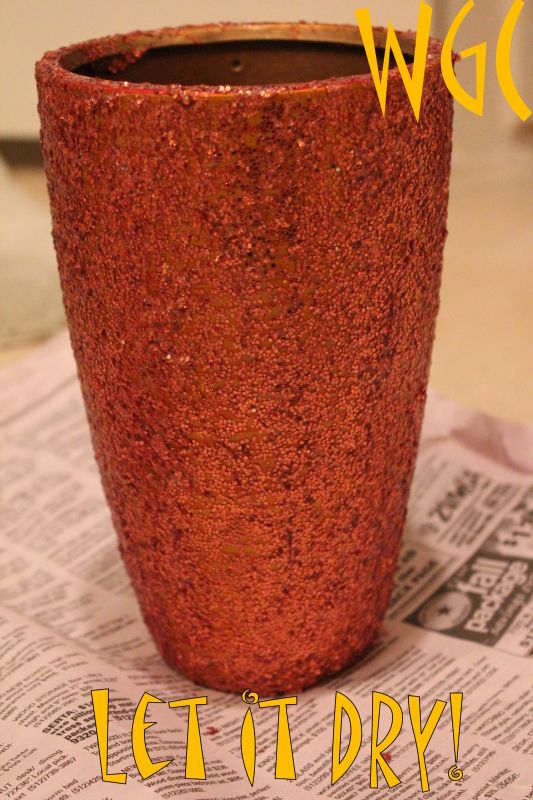
I still have three plain vases. What should I do? I was going to leave them blank, but my husband thinks they look . . . well, blank. My two ideas would be to borrow a page from Jaime's book and do a glitter vase, or to fill them with something cool. Glass beads? Autumn leaves? Colored water? (Ha--asking for trouble with four kids 8 & under!)

What do you think??

Hawaiin Shirt to A-Line Skirt

I love how my title sounded like a line from a poem. Good morning! Does anyone have some fun plans for the weekend? We're travelling some next week because it's spring break and I.am.so.excited. This is the first "kid vacation" we're taking and I can't wait to see PB's face when we get there! By kid vacation I mean one where we go to a certain place because we have kids. We're staying at a resort that has a mini water park. I'm ready to get some shopping in and some good eats!

I am completely ready for spring to get here! We have had some great weather but these dang cold fronts keep coming in from the north! To help encourage some warm weather I decided to make this skirt.

My husband was recently gifted this Hawaiian shirt. I took one look at it and decided he would most likely never wear it. He already has a couple and he hasn't worn them one time in the 7+ years I have known him BUT I liked the pattern and I thought it had great potential. I had visions of a  great high-waisted a-line skirt. I conceptualized and browsed through a few tutorials and this is what I came up with and it has POCKETS! This craft is somewhat wayward. I was making it up as I go so things aren't necessarily in their proper order but this is how I did it:


Need:
One Hawaiian shirt
1.5(ish) yards of lining fabric in coordinating color
A skirt that fits to see basic shape
 The first thing I did was take the pocket off the front. I then cut across the top to take away the collar and shoulders. I wanted the buttons in the back so I buttoned up the shirt and sewed along the left and right seams on either sides of the buttons. I flipped the sleeves in and sewed along the rim to make them face inside. I then flipped the skirt inside out and sewed the sleeves closed to make the pockets. I took the lining fabric and folded it in half top to bottom and side to side. I laid it under the existing skirt and traced along each side adding about half an inch on either side to make a waist band. I cut along the lines and sewed up each side.
 I then flipped it inside out and make sure it fit comparing it to the other skirt. I trimmed the extra fabric on the waist band depth and compared the top of the skirt to the width of the waist band. I added pleats in the front and back to match the sizes. I basted the pleats and then flipped the waist band inside out.

 I put the waist band and matched the corners. I pinned it and sewed along the top.


 I wanted the skirt to be a-line to I noticed the bottom needed to flare more. I used more of the lining fabric I folded it over and traced the line I wanted to skirt to follow. After trying on the skirt I adjusted these. I cut them and sewed the outer edge and then sewed the edge onto the skirt.

I then folded the piece of lining fabric in half and marked the edges of the skirt from the waistband down to make a lining for the skirt. I sewed the lining along the edge where the waistband and the skirt meet. I then decided to make it a tie closure in the back. I cut two 4"x15" (approximate) lengths of the lining fabric and sewed them into tubes and turned them right side out. I cut a 6" seam down the back and flipped them under and sewed them. I sewed the ties onto the waistband and tried it on. I made a couple of adjustments and trimmed off any extra fabric and strings.


 front
 back

Have you stolen permanently borrowed any of your husband's things to upcycle? I have another shirt I have my eye on of his :)

Baby shawl #4!

I finished one last knitting project at the end of 2013: another baby shawl for another baby! But this time, Jaime is the proud mama!

I sent Jaime some choices and she picked the pattern: Haruni by Emily Ross. I had plenty of Debbie Bliss Rialto Lace Yarn leftover from my baby's shawl, which took less than a skein, so I started on.


The other choices on my list:

I think Jaime chose well!

Once again, this one was down to the wire. I managed to get it in the mail and it arrived the day before the Baby Girl's blessing!

Printing on Iron On Transfer Paper

Hello Wayward Crafters!
I have been staying busy making quilts and being a nana. I have enjoyed reading the blog and plan to contribute from time to time.
This week we had 2 snow days. Snow days in our home usually makes our hearts turn to crafting. In the great blizzard of 2000, all the girls collaborated on what is known as snow day quilt, a snuggly quilt that has kept us warm for many years.
This week I decided to make my own version of an applique quilt that Jaime and I worked on when I visited her recently. It is from Quilters Newsletter August and September.
What I want to share is how I used my inkjet printer to print all the patterns. I realize that you can purchase iron-on printer paper, but it is a little more expensive than what you can buy (usually on sale!) from the bolt. (Get the paper-backed transfer webbing. It is #805 by Pellon.)

Here's how to do it. First, use a program such as Photoshop to move the images from the pattern to a 8 1/2 by 11 canvas size. Flip the images as needed. I always use the bucket tool to fill the images with white so it takes less ink.

Then, cut your iron-on transfer paper to 8 1/2 by 11". It is 17" wide, so you can get 2 8 1/2" pieces across.
The paper is too thin to go through my printer, so I used a piece of glossy photo paper as a backing. I lightly touched my iron across the top edge of the paper so that it was lightly adhered to the glossy side. I also smoothed down the paper, and ironed the bottom corners.

Then, print!

The webbing will pop right off the glossy photo paper, which you can use over and over. Roughly cut out the shapes and adhere them to the back of the fabric you selected.

That's it! It took me half a day to print and about that long to cut out the shapes. I ironed everything on the quilt blocks this morning.
I followed the pattern pretty closely. I added one more poinsettia in the top left block and made them all red instead of having green leaves. Jaime was more wayward and created a couple original blocks. I think it turned out to be very cute. I will tack all the edges with a zigzag stitch using invisible thread. The borders are made of crazy Christmas sweaters! That's next.
This is the template for the sweaters. The sky is the limit on how you make them.

Toddler Family Home Evening: Week 2


This is week two in the series of toddler Family Home Evening plans. Since toddler attention spans can be really brief here is a really brief yet super fun Family Home Evening for you. I have found that using the Mormon Channel scripture videos is so helpful. PB can't follow along with verbal stories as well as the cartoons that they have on there. So we have been watching those first and then talking about more. (see link below)


Theme: Lehi Dwelt in a Tent
Prep: Gather fort materials: blankets, string, hand clamps, etc.
Songs: Book of Mormon Stories , Nephi's Courage, Choose the Right Way
Lesson:
  1. Watch movie here about Lehi's family traveling in the wilderness
  2. Build a fort
  3. Discuss how when we follow God's commandments sometimes it's not how we think things should go but Lehi and his family were obedient and were blessed. 
Treats: Here is a little tent treat
 We had tons of fun!

Looking for more ideas click here for more toddler Family Home Evening ideas!

St. Patrick's Day Roundup

Can't get enough luck today? I've got a lucky announcement on my writing blog, but we've got some fast St. Patrick's Day crafts for a quick fix of Irish luck!


And just in case you missed it

How do you celebrate St. Patrick's Day??

St Patrick's Day Mantle and Faux Covered Books

This is the first year that I decorated for St. Patrick's Day. I gathered up stuff I had around the house and came up with this:


I had one green book and I covered two in green. This is how I did it. 

I cut the paper to just bigger than the books width. The paper that I had didn't cover the whole book (we'll see that later). I used 12"x12" paper. I folded the paper on one edge a little over an inch as below on one of the edges. 
 Use some tape on the inside of each edge. Tape it as it shows in the picture. Sticky side out. 
 Repeat on both sides and slide the book cover into the pocket it made. 
 Fold the paper around the book and tape on the back side. I used painter's tape so it could easily be removed without hurting the book. 
 I creased the edges to make it look like the real cover. 

 I used them to add some height to the the arrangement. 

Do you decorate for St Patty's Day?
Here are a few projects we've done in past years. 


Crock Pot White Chili

I was at a church activity with Brooke the first time I ever tried white chili. I LOVED it. While I was visiting Jaime in October we attempted to make some. It was more soup than it was chili. Since it snowed several inches recently I put white chili on our weekly meal plan. I looked at many recipes and kind of merged some together. It still was on the soupy side but it was thicker. So I guess next time I make it I will achieve a thicker chili!

Ingredients:
1 lb Chicken (I prefer breast, it shreds very easy)
1 can of chicken broth
1 can of Great Northern Beans (drained)
1 or 2 cans of green chilies (with or without tomato, whatever you like!)
1 cup sour cream
1 medium onion, diced
2 or 3 garlic cloves (I like mine minced)
1/4 teaspoon cayenne pepper
Salt
Pepper
Oregano

Place the chicken (raw) in the bottom of the crock pot. Add the onion, beans, chilies, and garlic. Then add the spices. Call it wayward if you so desire but I eyeball spices all the time so do what you want! Except the cayenne pepper...that's hot and I don't do hot so that one I measured. It gave it the perfect amount of kick for me. My husband on the other hand probably would've liked it far more spicy! Let that cook on high for 3-4 hours. At around 2 1/2 hours shred or cube your chicken. It should either be cooked or almost all the way cooked by then. At 3 hours add the sour cream. If you want it thicker I saw some suggestions to put whipping cream in it. I didn't have any on hand so though. Serve once heated through. Garnish with green onion if desired. Serve it with some corn bread to make it a truly homemade meal!


Toddler Family Home Evening: Week 1

On Monday nights lately we having been trying hard to have Family Home Evening. I looked all over the internet for ideas of FHE lessons for our two year old and I used a few but wasn't really happy with what I found so I came up with my own ideas. I will be posting our toddler FHE lessons every couple of weeks. I hope there are some ideas you can use! I have found that using the Mormon Channel scripture videos is so helpful. PB can't follow along with verbal stories as well as the cartoons that they have on there. So we have been watching those first and then talking about more. (see link below)


Theme: The Parable of the Lost Sheep

Prep: Print out a picture like the one above, color (optional), and cut into a puzzle shape. Make some treasure hunt clues* for around the house. Hide the clues plus one of the pieces from the puzzle. I cut a special heart shape to be the missing piece.
Lesson: 
  1. Play this video.
  2. Give all but the one piece of the puzzle for the child(ren) to complete. When they discover there is one piece missing give them the first clue.
  3. Follow the clues and find the last piece.
  4. Talk about how exciting it is to find the piece just like when the shepherd found the lost lamb or when we are bad but then change and become better and follow Jesus Christ.
*My clues included
  • Look where we keep food (picture of food)
  • Look where you go potty (picture of toilet)
  • Look where you go to sleep (bed)
  • Look where you play with toys (picture of toys)
  • Look in Daddy's pocket (picture of Daddy)
Treats: Here are a few sheep treats. One, two, three.

Stay tuned for more ideas! Enjoy!